
Yes, I know. Every time I make some fake/faux cleaning product, I add an 'Sch' to the front. Can't help it. It makes me laugh. Last night, I attempted to make a Swiffer Duster that you can wash and reuse. After the fact, I found a tutorial HERE that I will follow next time! I do everything backward. What can I say? Maybe you can learn from my mistakes. Here we go...


Start by cutting off the factory-serged edges.

Then cut your cloth into 4 squares. I just folded it in half, cut.
Folded it in half the other way, then cut.
My cloth was approx 15 x 15 before cutting.

Measure in 1 1/4" from one of the edges and make a mark.
This will allow room for the handle to slide in and not stick out too far.
Do this to two pieces, on both ends.

You should now have something that looks like this.
Two marked, two unmarked.

Stack a marked piece on top of an unmarked piece.
Find the center of the top piece and make marks
going vertically between the two horizontal lines.
This will be where you sew them together.

With two pieces together, sew from one horizontal line to the other
using a straight stitch. You will do the following to both stacks.

I did a stay stitch at both ends.

This next part, I just eyeballed. Approx 3/4" to the right of the
stitching in the middle, do another line of stitching parallel to
the middle one and just as long, between the two horizontal lines.

Then turn it 180 degrees and do the same on the
other side of the line. Be sure stay between the
two horizontal lines. Do this to both stacks of fabric.

Trim threads so they don't get in your way.

Next, you will sew the two stacks together. I didn't have
my sewing kit handy, so I just laid one on top of the other,
lining up my sewing lines. Real technical, huh?

Still staying between the two horizontal lines again, sew just down
the center. Stay on top of your prior stitching unless you have a
heavy duty sewing machine. Mine kept getting bogged down when
I did the heavier piled orange one earlier. Stay stitch at both ends.

Okay, this next part threw me for a loop. I thought I was going
to be able to slide my handle in and start swiffering once I cut
little slits. Glad I tried this before I cut them all! It occurred to me
that my handle could only go on one side or the other, on the
very outer edge. I wanted it to go in the center, so I had to do
some creative sewing. *DING* As I type, I'm having a light
bulb moment to fix this! (I'll type that at the bottom. Aren't you
glad you came here, so I can tell you how I made something,
only to change it completely around later? LOL!)
Anyway, here's how it looks from the side now. I somehow
needed to sew a casing into the middle layers after the fact!

I decided I'd fold two sides over to the other side,
essentially exposing only the two middle layers.
Because the casing is already sewn in the top and
bottom layers, I had to try to sew right on top of them.
I stayed as close to that fold as I could and did both sides.

Remember, you still need to stay within those horizontal lines made.
Why? I'm not sure, but I'm sure it'll mess with sliding the handle in.

Trim excess threads and this is what you have.
Sheesh, that's a lot of work for this little thing!

It occurred to me that all my layers would be the same size and
not add any good volume unless I trimmed them. I trimmed about
1/2"-3/4" from the top layer on both sides. Turn it over and do the same
to the top layer only.

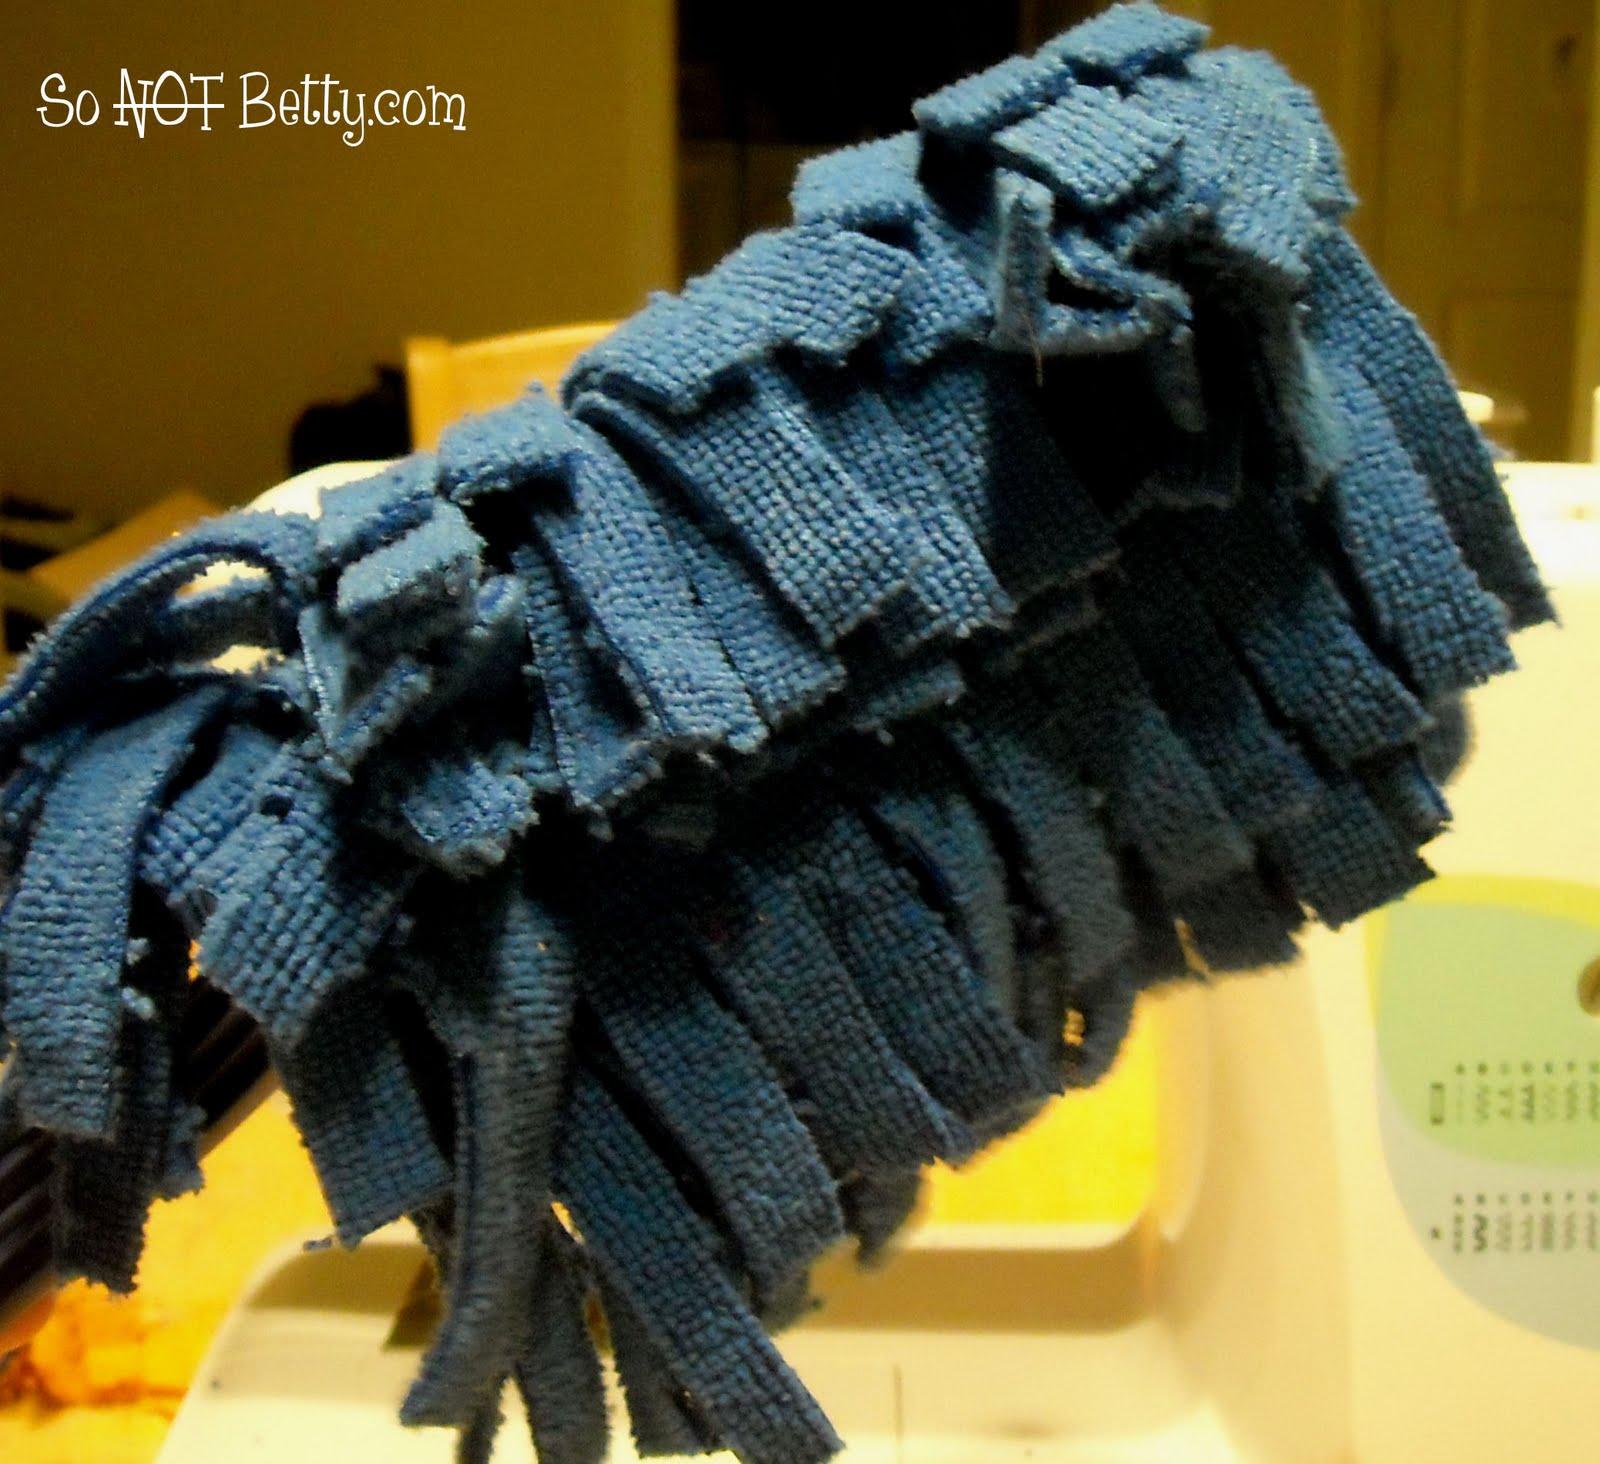
Now it's time to cut your fringe. Start on the first layer
Cut to the stitching line, being careful not to cut into it.

When done with that layer, flip up and do the next layer.
Continue until you're done with the whole thing.

I tried to slide the handle in and ...uh, oh! It wouldn't go in all the way!
Arghhhh! You mean I went through all of that for nothing! It was just
too thick for the little tab to open up for, so I broke that little tab off.
Do NOT do this! Big mistake! My swiffer now slid onto the handle,
but flew off every time I'd shake it! Frustrating experiment this is!

I had to figure some other way to do this. I hated to do it, but didn't
want to waste the microfiber cloth and all of my time, so I cut a little
square notch out of the two top and bottom layers of my swiffer.

Phew! My handle inserted (somewhat) easily now!

Here's my reusable, washable 'schwiffer' duster! Cool, huh?
Ahhhh, but does it work? Well, lookie here! I found the most dusty
thing I could find, which was a transom-type window high above
one of our doors. It has (shamefully) never been dusted (too high!).
Looks like it works to meeeeeee! Albeit a pain in the butt to make.

The price of the refills for the Swiffer Duster is just crazy. Although I did see a cheap alternative at Dollar General, I thought maybe I could make my own. I first had designs on using old, used dryer sheets. But then thought, they'd fall apart after awhile. Would it be worth my time? I'm still not ruling them out because the above project took me quite a while and could be difficult to sew if your cloth is too thick. Of course, the first time you do anything, it takes longer.
The pros:
- It actually cleans really well. I like microfiber cloths because they clean really well and seem to have a static-y quality to them that attracts dust. After all, that's what I'm trying to do, right?
- It can be washed and used over and over! No more (continually) buying and throwing out paper products!
- This is great for dusting on top of and around things, but it's too thick to slide in between things, like the cable box and the shelf it sits on.
- It is a real pain in the butt to make! But once you have it, you have it!
Speaking of not being smart...remember my light bulb moment above? It suddenly occurred to me that I could just sew the casing in ONE layer, sandwich that layer between the two other (unsewn) layers, then just sew a line down the middle, then cut the strips. Duhhhhh! Oh, well. That's how we learn, by trying things and failing. I've been doing a lot of learning lately, lol! You'd think I'd wait until I had it right to make this post on my blog. Nope. I figure maybe it will be a learning experience for me and maybe for you, too. Maybe it will help you learn what NOT do to, or even to spark your creativity to make something you've never thought of before. As I said in the beginning, this is all one big experiment!
I may try making the flannel one as in the tutorial at the top of this post. Just gotta get some super cheap fabric. I can't imagine it's as clingy as my microfiber, but you never know. I do remember being a child and wearing a flannel night gown to bed. We'd pull up the covers (the old, nappy, scratchy kind that I'm not even sure they make anymore....probably because they were a major fire hazard) and having little sparks of static-y light pop and sparkle. So, there's definitely some static there. Anyone else ever do that, or were we just total weirdos? LOL! Don't answer that...
Maybe you can think of a cool cleaning product of your own to make! Use your imagination! Look at some of the stuff you buy over and over and think to yourself....can I MAKE that?! I bet you'd be surprised!

I'm not sure I followed your tutorial very well, but it sure does look like a Swiffer to me and it looked like it worked too.
ReplyDelete