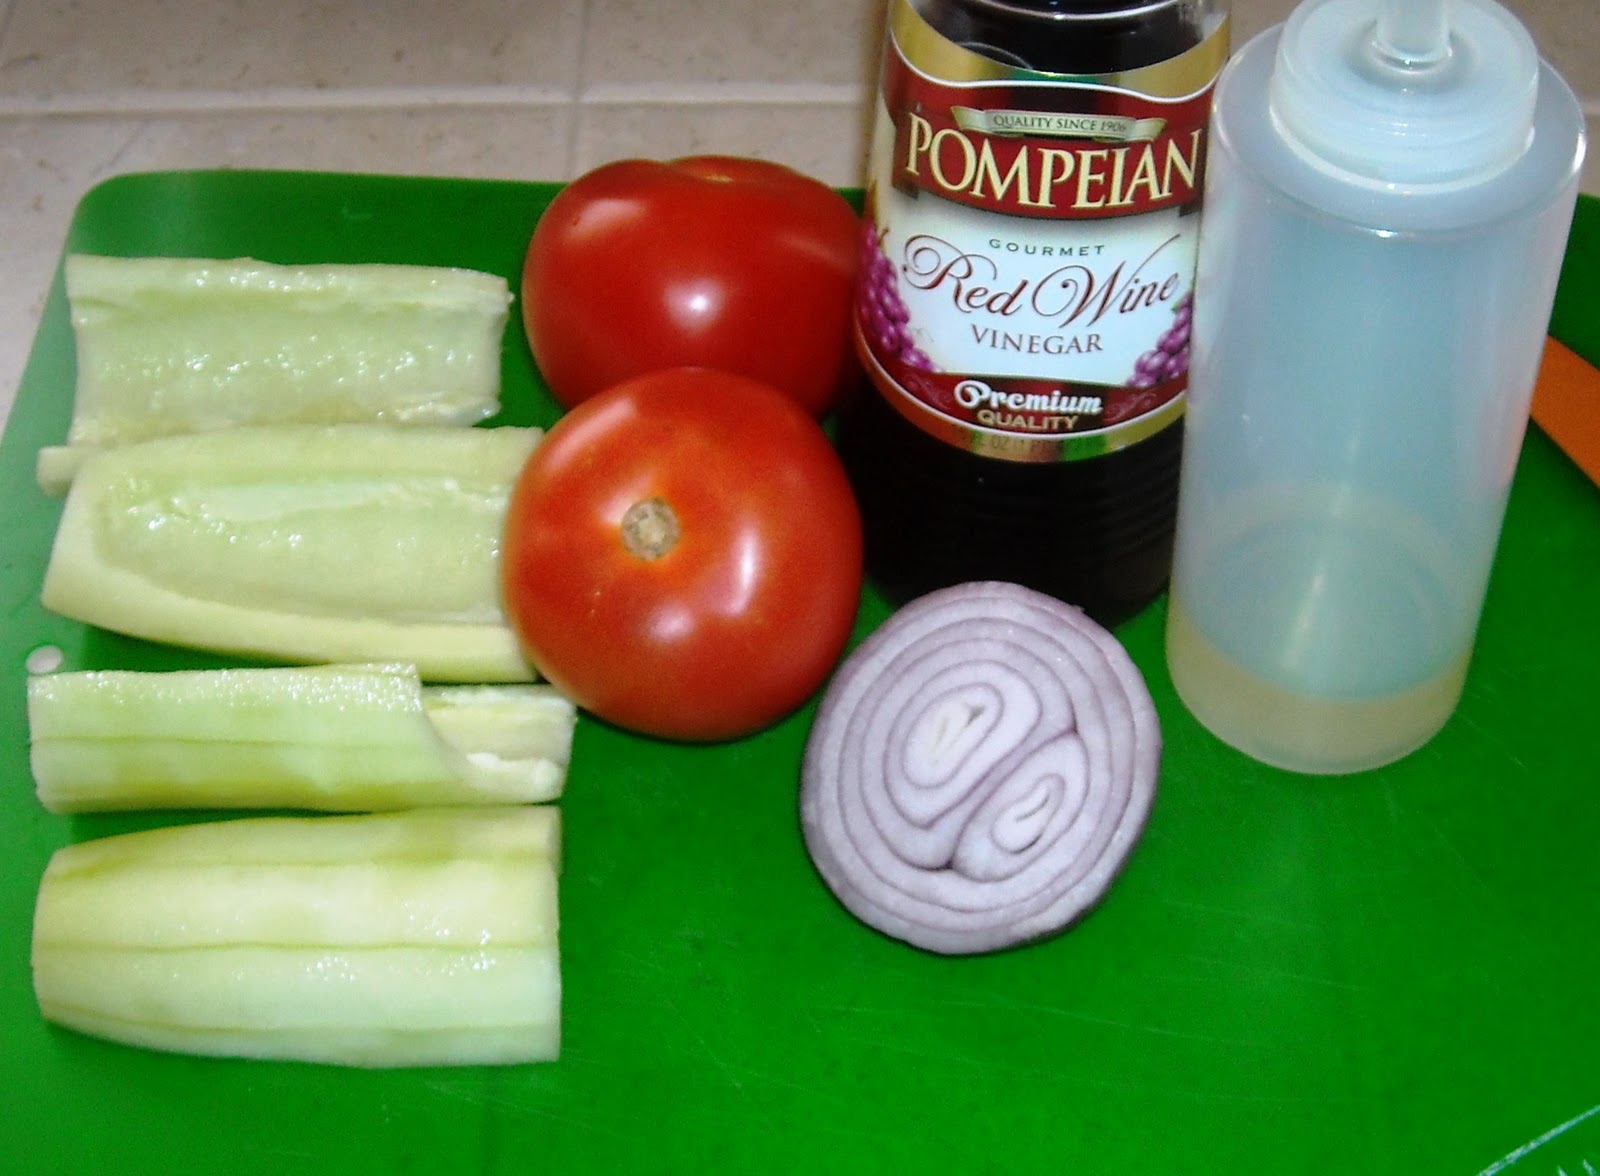
Tuesday, November 29, 2011

Cucumber Tomato Salad

Here's a simple recipe that is best suited to summer, really.  I made this to take to my Aunt and Uncle's house for Thanksgiving dinner because I'm on a diet and I needed something I could eat.  I'm going to show you the 'normal' version.  For the love of God, people, unless you are desperate, do NOT make the diet version like I did using Truvia.  Blech!  Normal version?  Yum!!!


You will need:
1 Large Cucumber
2 Medium Tomatoes
1/4 to 1/2 Small Red Onion
3T Red Wine Vinegar
2t Extra LIGHT Olive Oil (or other neutral flavored oil)
Not shown:  Sugar to taste (or Truvia if you're on a diet from hell like me)


Start by peeling, quartering and seeding your cuke.  Just use a spoon 
to scrape out the seeds, then you'll have no burps.  Don't waste your
hard earned street-walkin', pole-dancin' dollars on the high and mighty
English seedless cucumbers.  What a rip!  I'm convinced you're paying
the extra $2.19 for it to be wrapped in cellophane! 
Go to Aldi's!  79 cents!
 Then dice it. 
Did you know that "dicing" is used in reference to actual dice?  It's true!  
The size of a diced food should be about 1/2-3/4" square, or the size of a dice.
If you want it smaller, you would do a 'small dice'.  I know, I'm a
veritable wellspring of information.  It's the burden I bear for you people.
I like to cut each quarter into strips, then dice it.  Easier.
And lastly, mince up your onion.  I only used about a Tablespoon
in the whole salad.  Red onions are just a little too pushy, 
if you ask me!  They like to take over!
Throw it all in a container and add in 2-3T Red Wine Vinegar.  And yes,
I do realize that it's a teaspoon in the picture.  All of my Tablespoons
were dirty from doing other fancy projects that day.
 Then add in about 2t oil.  I used 1T, 
but found it a little on the oily side.
Sprinkle in your sugar and mix well.  As mentioned earlier, I used Truvia.
While it initially tasted pretty good, it quickly turned bitter as time wore on.
And by 'wearing on', I mean a few hours.
And lastly, add some salt and pepper to taste and mix well.

Cover it and throw it in the fridge for a few hours, mixing now and again to distribute the oil and vinegar.  It tends to taste better if you leave it overnight.  It's really low cal and filling if you eat a cup or two of it.  Har de har.  No really, I've done it. In the summer, I tend to add a minced garlic clove which really ups the flavor.  The only problem is, I like it so much that way, I eat a lot and then I just smell like a salami.  All day. 

How to sharpen a knife with a cup!

Did you think my blog post title had a typo in it?  Nope!  Here's a quick tutorial on how to quickly sharpen your average quality home knife.  I say 'average' because this isn't something you'd want to do on your $200 chef knife.  Not that anyone reading my budget-minded blog has them, but you never know.  On with the tut...

You will need one dull knife and one coffee cup/mug...that's it!  Really!

First, I'll show you just how dull my $6 grocery-store-bought knife is!
This is your average piece of copy paper.  See how the knife cuts jaggedy 
and then starts to tear the paper?  That baby is dull as dishwater!
So, here's my solution.  Don't ask me where I saw this.  You turn your
cup upside down like so.  Yes, that's some old Martha Stewart Everyday 
Living from back in the Kmart days.  I love these dishes, actually. 
Anyway, quit sidetracking me.  You see that little white ring of uncoated porcelain?  
Is it porcelain?  Heck, I dunno!  Anyway.....
You take your knife blade and hold it at about a 30 degree angle
against the unfinished part of the cup.  I like to start it going AWAY from me
just in case.  Start at the wider end and drag the knife downward.
until you get to the tip.  Repeat several times.  Yes, this will make a
silvery-black mark on the unfinished part.  Will it come off?  I don't
know.  I just throw my cup back in the cupboard when I'm done!
Then, carefully turn the knife over and do the other side.  Use caution
when bringing it toward yourself.  Try to use control over trying to work
quickly.  That's just a recipe for disaster, honestly.  Looking back, I 
probably should have put the cup on a towel first to minimize sliding around.
Wipe your knife blade off with a clean towel.  I know, you were
gonna get a skanky one off the bathroom floor, right?  Yeahhhh!
BTW, don't leave your towels on the floor...that's disgusting
and it builds up stinkyness and bacteria.  This is directed at my son.
Moving on....(and I wonder why people think I'm crazy!)
Try the paper test again!  Heyyyy, this time it cuts cleanly!
(Well, actually it didn't.  I had to scrape the knife a few more
times on each side, but you didn't need to know that)
So, if you don't have a fancy schmancy knife sharpener, this is a quick remedy.  We actually do have a knife sharpener, but it really doesn't seem to do a very good job. This gave really quick results.  Give it a try and let me know what you think!  Sure made cutting my tomatoes a lot easier!

Wednesday, November 23, 2011

"LEFTOVER" Eggs

Here's a good way to use up your leftovers and create a healthy, protein and veggie-rich breakfast!  I hate having to throw away leftovers, but most people just don't want to eat them.  Can you blame them?  Unless it's lasagna, then they're just crazy people!  Here's what you'll need...
Ingredients for one large serving:
2 Eggs
Fat of choice (butter, oil) Not shown
Leftovers of your choice.  In my case:
Chicken hindquarter
Broccoli, fresh
Cauliflower, roasted
Onion, fresh
Yellow Pepper, fresh
Milk or cream

I like to start by adding my fat to the pan (in my case, unscented, unflavored Coconut Oil), then dumping all of my leftovers on top.  I used about 2T of each leftover.  
I forgot that I had some yellow pepper that needed to be used up, too.  So I added that in there, too.  Cook until browned.  Remember, browned food is flavorful food!
Crack your eggs into a bowl and add 2T of milk or cream.  In my case, I've used whey.  Why whey? Well, I made some homemade yogurt a few days ago and this is the why that drained off.  I totally forgot to take pix!  Probably because I assumed it would flop.  It didn't.  It was awesome!  I promise to do it the next time I make it.  I've found many places I can the whey in recipes.  To thin down homemade Ranch Dressing (also forgot to take pix), in eggs, as a treat for the dog, or in any place milk is called for.  It's very nutrient-dense and has probiotics, whatever those are, but they're good for you!
Whip that baby up good!
And pour into your veggie/meat mixture.  Be sure to add some more fat if the pan is dry.
Cook it up just like you would scrambled eggs and plop on a plate with some oven-fried bacon!  Of course, you could always add some grated cheese at the last minute, too. You're getting 1/2C of veggies, lots of protein, good fats, first thing in the morning!  If you eat a big breakfast like this one with fats and lots of protein, you will be filled up until lunch time and will notice you don't need to snack!  It's a win-win situation!

Oven Fried Bacon

Today, class, we're gonna learn us how to make some oven fraahhhhhed bayyycon!  This is my favorite way to do it because I can actually cook other stuff while it's cooking.  I also like that it stays relatively flat this way.  It's totally crispy because you don't get a lot of 'waves' in your bacon that are rubbery like pan-fried.  Here's how you do it.

Go to the fridge and look for your bacon.  Realize you forgot to thaw it last night and say, "Oh, crap!"  Go to the garage, get your bacon out of the freezer and throw it in the sink.  Cover with warm water.  Wait 15-20 minutes.  Get yourself a nice cup of coffee and read the paper while you wait.

Now, I want to show you something about this bacon.  See that?  In the upper, right hand corner.  That says "Lower Sodium".  I don't necessarily WANT Low-Sodium bacon, but I did want sugar-free bacon.  (Been avoiding sugar and grains lately...long story)  Anyway, if you have a diet requirement of LowSod, Kroger sells one (shown below) that is pretty decent, but you get the added benefit of no sugar. Everyone could use a little less sugar, I suppose. Unless you're a sour puss, then by all means, buy the Brown Sugar cured bacon...mmmmmmm.   If you do not require low sodium, you may actually want to SALT this bacon after it gets done cooking.  Yeahhhh, it's kinda bland.  On with the show...Preheat your oven to 400 degrees.
Like I really need to show you this, but you take kitchen shears and cut around 3 sides of the package. Who knows, maybe someone in a remote country is reading this and thinking...I never knew!!!
This next part is optional, but I like to think it makes things go faster.  I cut the entire package of bacon in half.
Line a sheet pan (or two) with aluminum foil.  Be sure your foil is wide enough to have an edge sticking up on all sides.  We don't want the bacon grease to get under the foil, making us have to clean a skanky pan!  God forbid!  Of course, you really should clean your pan anyway, but who wants to scrub scrub scrub?
Next, lay down your bacon in tidy little rows, being sure not to overlap. If you are worried about your bacon splattering (it really doesn't that much), you can always put a piece of foil on TOP of the bacon, too, but I find that it takes longer to cook and doesn't get as crispy due to the steaming effect inside the foil.

UPDATE!  I am a total liar!!!!  It splatters like the dickens!  You just don't know it until after you've done a few batches in a row!  See my oven cleaning recipe HERE.  What was I thinking?!
Pop both trays in the preheated oven.  I like to stagger them a bit. Set the timer for 10 minutes.  It will not be done in 10 minutes, but that's a good starting point.  My bacon is very thin. 
Check every couple of minutes after that. 
Your bottom tray will quite obviously cook faster than your top tray as it is closer to the heating element.  See the difference?  I sometimes switch them around at this point.
I take them out when they look golden brown, not too dark.  They tend to be a little more 'done' than they look, so err on the side of caution.  Boy, those little guys shrink up a lot!
You'll want to remove them immediately to drain on paper towels.  Be sure to blot the fat off the top, too.  See that big puddle of bacon grease?  Don't throw it out!  Strain it through a coffee filter into a container and keep in the fridge.  Makes a great oil to cook your eggs in, make a bacon vinaigrette, or to cook green beans in.  That's the way Grandma woulda done it!  No waste!
Serve your bacon up with 'Leftover' Eggs and you have a high-protein, low-carb, veggie-filled lovely brekky!  Yum!
 When you've had your fill of bacon, store it in a baggie and throw in the freezer.  So handy to be able to just grab a couple of pieces for breakfast or to add to a recipe.  You can either nuke 'em for a few seconds, or do like I do... When I get done frying a couple of eggs, I throw the frozen bacon in the pan and it's hot and crispy in a couple of minutes.  Shoot, you don't even have to thaw them or crisp them.  Half the time, I grab a frozen one and gnaw on it, lol.  I'm serious....they're good!

Stretching your fabric softener

Here's a handy dandy way to stretch your fabric softener, but still get that lovely scent you know and love.
You'll need:
Ingredients:
2C of your favorite Fab Softener
4C White Vinegar
4C+ Tap Water
A large, empty old Fab Softener bottle

Start by pouring your fabric softener into the empty bottle.  Not to be confused with stool softener, although I could use some of that.  I know, I'm gross.  The time away did nothing for my demented sense of humor, lol!  Try not to look at the crusty state of my bottle.  I said DON'T look!  Thank you!
Next, pour in your vinegar.  Did you know that if you wanted to, you could JUST use vinegar to soften your clothes?  Yup, it's true!  It does smell a little vinegary when you take the clothes out of the washer when you choose that option.  But I promise you, all vinegar-laden underwear smell nice and fresh when done in the dryer.  It's true!
And lastly, add in your water.  Depending on the size of your container, you may need to add more.  I want to think I had to add another 4C to fill it to the top.  
Now, pop on the lid tightly and give it a gently back and forth shake to mix the ingredients together.  

Notes: 
The good news about this stuff is that you only need about 1/2 a capful for the whole load, maybe even less.  It is watery, but that's okay.  When I had our washer repaired, the technician told me that he hates the commercial fabric softeners because they are wayyyy too thick and they contain a lot of FAT/OIL!  Fat and oil?!?!?  Yup!  You should have seen how disgusting that was under the fabric softener thingy when he took it apart.  It was white (which is the leftover fatty stuff once the good smelly part washes away), with a bunch of black mold under there (which is the fatty part going RANCID!!!)  Ewwwww!!!  SSSooooooo disgusting!  He suggested that when I use commercial fabric softener, to water it down 50/50.  I had been doing that, but I knew I could do it even cheaper, hence this recipe.  Now, you will see online where some people suggest using cheap hair conditioner instead of fabric softener. Don't do it.  It never emulsifies with the other ingredients, no matter how much you shake that baby.  It just floats around in little chunks.  With this recipe, I haven't even had to shake the bottle before pouring.  Comes out great every time.   Costs a fraction of what it used to and clothes still feel and smell great!

Hey there! How are ya?!

Hi everybody!  Sorry it's been so long since I've posted!  I'm still having some computer troubles, but I can at least post.  My big hard drive is apparently fried, so I'm using a smaller one that originally came with my computer.  The bad news...the fried hard drive...it has ALL of Tommy's pictures on there from the day he was born until present!  While I have printed off as many pix as we could afford in the past, it doesn't even come close to what is on there. Not that I would print every one, but you know what I mean.

I had everything in separate files with the event, holiday, sport, etc...so organized and unlike me, lol.  The good news?  The computer guy can send the hard drive away to a place that does a sort of hard drive surgery, where they go in a sterile environment, somehow remove the files/data and put them on either a new drive or maybe a disk, not sure.  Data recovery, veryyyy expensive...$600 minimum.  Do we have it?  Nope!  So, the computer guy is just hanging on to my hard drive until we have the funds to do it. 

I'm so sad.  The lesson learned?  Either print out your favorite pix or upload them to someplace online (which I'm assuming means God and everybody can see them) or burn them to CDs or a flash drive.  Since the pictures are not replaceable, we're just going to have to save up the money.  This is part of the reason I haven't posted in so long.  A lot of the recipes/projects I last did for this site are ON that hard drive.  I have started a few new projects and hope to start posting a little more frequently.  Thanks for your patience.  Have a very happy Thanksgiving!