Showing posts with label Food Storage. Show all posts

Monday, June 11, 2012

Freezing Fresh Strawberries

A few weeks ago my husband got a really good buy on strawberries at Aldi.  99c a pound.  Not too shabby!  When he came home with 4 pounds I thought...we can't possibly eat those before they go bad!  I eat a serving of berries a day, but I knew I couldn't eat these fast enough.  So I decided to freeze them.

Did you know that berries are really high in antioxidants, which are purported to be helpful in staving off cancer?  Particularly blackberries. The darker the berry, the better the benefits. When I was preggo with my son, my doula told us she ate them every day because colon cancer ran in her family. You learn something new every day!

Yes, I am aware there are only 3# of strawberries shown below.  I already plopped the first batch in the sink before I remembered to take a picture.  Sometimes it's hard to remember to take pictures of everything you make, lol!
Start by cleaning your sink with salt and/or baking soda.  We don't want any chemicals in there tainting our berries.  (Well, they're probably already tainted since they aren't organic, but what are ya gonna do?)  Rinse sink thoroughly with hot water.   Then fill with cold water and a big splash of vinegar. My friend  Mary has a post on her site about how vinegar can prolong the life of berries you intend to refrigerate.  I used it with the intent to clean my berries not realizing it would have that affect, so that's a nice added bonus!  
After soaking for a bit, drain the berries and put them on a towel to dry.  Pat dry with a 2nd towel.
Hull each strawberry, removing the green part.
This next part is something I did because I had just made an Angel Food Cake and I wanted to save some spare parts to toss with sugar.  I cut off the top part with the hole in it, creating a pile of strawberry 'donuts'.
I then took each strawberry and cut it into quarters.
I decided to line a couple of sheet pans with some waxed paper.  I had intended on using parchment, but I was out.  Looking back, I would have been better off just putting the berries on the bare pans because they stuck like glue to the waxed paper and was a pain to pick off.  Had they been on the bare pans, they still would have needed to be pried off with a spatula, but it would have been a lot easier.  So, please learn from my mistakes.
Spread out your cut berries on the sheets.  You can that the left pan has a bunch of smaller pieces cut up on it. I started out cutting them up very small because I don't like eating large pieces.  But darn, that was a pain so I gave up on that business.
Place pans in the freezer until frozen solid.  Gently pry off the berries and put in a freezer bag.  This way, you can take out as little or as much as you want.  I got a full gallon bag out of these!  Remember, I still have a bunch of little donut pieces, too.  
Here's what I did with those little donuts...I cut them up into a small dice.  
Then I threw in a couple of tablespoons of sugar, stirred it up and threw it in the fridge for dessert later.
So, basically, I had 4 Lbs of strawberries for $3.96.  The sugar-free frozen bags I normally buy from Aldi cost $2.99 for 2 Lbs.  This was a 33% savings for just a bit of work.  I think it was worth it because the strawberries I normally buy are frozen whole.  I have to wait quite a while for them to thaw half way each night before I have them.  Cutting my own should cut down on my wait time. What I do is throw some in a bowl and add in a little stevia.  When they're partially thawed, I smash them up.  It's frosty and has the texture of sorbet!  I also add in a tiny pinch of real sea salt.  It's healthy, super yummy and takes care of my sweet cravings!

Friday, April 13, 2012

Reusable Snack Bags

I hate buying zip-top baggies!  Hate it hate it hate it, stomp, stomp, stomp!  Every time I buy them, all I can think about is how many we go through!  While I will wash my gallon and quart sized ones (when in the mood), I have absolutely NO desire to wash those tiny little snack bags that I use in my son's lunch every day!  No, sir! 

One might argue that they're pretty cheap at only $1.00-$1.50 a box of 40-50 if you go to the dollar store.  And I might argue back that if you go through a box in less than 2 weeks, it's not really much of a bargain, now, is it?  Hmmmmm?!? (she said with a snarky tone).  Seriously, we use 4 to 5 of these each day in my son's lunch!  One for fruit, one for pretzels, one for a 1/2 sandwich, one for 'dessert', one for cheese, etc... And we use even more of them when going to sports practices. 

While 75c a week doesn't sound like that much, it does add up over time.  Not to mention, it's just trash that will end up in a landfill somewhere.  Not that I'm a tree-hugger extraordinaire, but it's just wasteful and that gets my knickers in a knot!  We've become so accustomed to living in a disposable world, it's kind of sad.  So, at the risk of embarrassing my son, I decided to make him some reusable snack bags.  Here's how:

I'll give you how much I purchased of each fabric below, but be forewarned....I thought I'd need more fabric than I did.  I ended up using next to nothing!  Just grab some scraps that you have.  However, you will need to purchase something called PUL.  This is thin fabric on one side and a waterproof lining on the other.  If you look closely, you can see the line of where the waterproofing starts.
This is a polyurethane lined fabric. (P.U.L....but they actually pronounce it like the word 'pull')  Some stores sell ones that have decorative fabric on one side.  If you can find one you like, you won't even need scraps of fabric.  The store I went to only sold plain white. See disclaimer below***

Here's what I bought:
1 Yard PUL
1/4 Yard each of decorative fabrics
Sewing machine (duh!)
Coordinating thread, or plain white since it's on the inside.
This much fabric is enough to make probably 40-50 snack bags!!!

Here's what I really needed:
1/4 Yard PUL (It costs about $9-$10 a yard...yikes!)
1/4 Yard Cheap Cotton Broadcloth ($2.09 a yard on sale)
 This is about enough to make 10-12 bags depending on the width of your fabric.  

Start by cutting your fabric and PUL to the desired size.  I'm going to make only snack sized bags since that's what we use everyday.  My son never eats more than a half a sandwich anyway (although, after I was done, I wondered if half a sammy would fit in one of these without being smashed to death.  I may need to adjust.  His usual fare is a hot dog (cringe!!) that has been cut into little discs (what he likes to call 'boobies'....I know....he's demented) and heated in the microwave until crusty!  Ack.  Anyway, I cut mine 9" x 6".  You can figure out how big you want yours and adjust accordingly.  Please don't ask for measurements of other sizes.  I'm new at this, people! Make sure you cut one layer of PUL and one layer of fabric.  You will put right sides together.  I am calling the shiny, lined side of the PUL the right side.
Sew both short ends with a straight stitch.  I just used 1/4" seam allowance because it's easy.  If you have a serger, that'd work splendidly, too.
When you're done, you'll have a 'tube' so to speak.  Do NOT iron your seams.  We cannot have any heat coming into contact with our toxic lining, ha ha ha ha.  No, seriously, you'll melt it.
Turn that right side out. Finger press as flat as you can.
Pretty side up, take one side of your fabric and fold it over about an inch and a half.  The picture shows 2 inches.  That's too many, I have since discovered.  Also a note about patterns: My robots ended up being upside down on the finished bag, so I should have folded the left side in first.  Just a note if you have a pattern that runs a certain way.
Next, fold the other side toward your first fold.  
And lay down on top of your first fold, about 1/2 to 2/3 of the way up.  I know, I have it almost the whole way.  Don't do that.  It's too hard to turn otherwise and gets bulky.  I quickly learned this lesson after sewing a few, but failed to take pix.  Sorry 'bout that.
Just like we did at the beginning, sew both short sides with a straight stitch, using 1/4" seam allowance.  I started at what would be the bottom of the bag so I wouldn't get puckers.  You will sew through all layers.
Sew down one side, then the other.
I didn't take pix of it, but I decided to trim off the excess fabric, about 1/8" away from the seam after the fact.  It made it less bulky.  Trim off all your little threads, too.  Like you needed a picture of that, lol!
You should have something like this.
Turn your pocket inside out. 
 And then turn your flap over the top.
Here's your finished snack bag!  Cute, huh?!
You can also use some coordinating fabric to make them a little fancier.
All in all, these ended up costing about .29c each to make.  That might seem like a lot when a zip top baggie is only .02 to .03 cents, but this will be used over and over with no waste.  They should pay themselves off in about 2 months, whoo hooo!  I like that.

As an added bonus, my son said everyone at school was raving about his new bags and how 'cool' they are!  I was worried he would think the robots were dorky because he is, after all, a very sophisticated newly-turned seven year old, ah-hem!  I'm thinking of making a coordinating napkin, but I think my son might find that a bit much.  Heck, I could even make a lunch bag!  Of course, next year, he'll find the robots dorky and I'd have to start all over, so forget that!  His friend's mom even suggested I make them and sell them.  Ehhhh, I dunno.  Still gotta work out what 'safe' fabric to use.  See disclaimer below.

I LOVE the cleanup of these!  They came home the first day with just a few crumbs in a couple of them, some strawberries stains in another, and some greasy hot dog marks in yet another.  I just turned them all inside-out and wiped them down with a wet paper towel, saving the greasy one for last.  Everything came off super easy!  I will probably wash these once a week and hang to dry.  I'm a little hesitant to expose the PUL to the dryer, lest it leach out some unsavory chemicals.  I would also recommend never putting hot food in these or using them in the microwave.  I have stopped using plastic stuff altogether in the mic.  Heat and plastic don't mix.  I've also moved to storing most all my foodstuffs/leftovers in glass jars, but that's another post for another day.  Moving on...

After I made these, I thought about my friend, Mary.  She gave me some really cool potato bags a while back.  I went to look at them and they are essentially made the same way!  You can see her post HERE.
I can attest that her potato bags make one fabulous potato!  She also has a link to a tutorial.

***About this PUL fabric.  I am on the fence about this.  I have searched high and low to find out if this stuff is safe for food use.  My first priority is my child's safety, of course.  I have read SOOOOO many blog posts with some people saying PUL is safe for food, others saying it is not.  I cannot find any reliable information about this yet.  A lot of opinions seem to be that it isn't food safe only because the FDA hasn't tested it yet.  Popular zip top bags are made with polyethylene and PUL is made with polyurethane.  From some of the stuff I have read over the last few days, the polyethylene seems more harmful. 

Because I've seen so many arguments taking place on websites about the safety of this PUL fabric, I fell obligated to say the following: This post is meant to teach you HOW to do something, not to discuss whether the PUL is safe.  Please do not start a comment war about this.  This is my first attempt and this is what I'm using.  If I find time to do something more green, like waxing fabric or using Lansinoh, I will.  (WAXING fabric?!  Yeah....who knew?!  Just heard about it today myself)  But for now, it is what it is.  Thousands of people seem to be using them without incident, but what do I know?  I have just seen so many people going back and forth online, arguing and it really gets old.  Good thing I probably don't have enough followers to have that happen, lol!  But please know I am doing more research and may try to do something more natural as time allows.  I will update when and if that happens.  Or when my child grows a third ear.  You could always just make these with muslin on the inside, but you'd have no water-proofing quality to it and the muslin will stain.  And dry out your sandwich.  Just sayin'.

Something I actually DO know....Please make sure to NOT use oil cloth or those plastic-lined cheapo table cloths.  They are not safe. 

Wednesday, February 15, 2012

Repurposing bottles

For a few months now, I've been hoarding, er, recycling some of my old bottles from dressings and things I'm hoping to never have to buy again.  My thinking was...well, if I'm going to be making my own stuff, I'll need some bottles to use to store the stuff in, right?  It's not in my budget right now to go out and purchase any, so this just came about from necessity.  Or, maybe I'm just getting old and weird, lol! 

I started out by putting the bottles in the dishwasher, hoping the super hot water would get them totally clean and remove the label.  Well, it got them clean, but didn't remove the labels.  Then I got to thinking....hmmmm, that's probably not too good for the old dishwasher, lol.
So, I ended up tossing them in a sink full of scorching hot water with some dish soap.  I let them soak for an hour or so.
I was then able to peel the majority of the label off by rubbing my thumb across it.
But I was still left with the gummy little film from the adhesive.  Now, I know I could have used some GooGone if I had any, but I didn't.  Besides, I was trying to use as little chemicals as possible, especially since I plan on storing food and food ingredients in these.* 
So, thinking that Baby Oil is pretty mild, I rubbed some of that on the gummy stuff with a piece of cotton.  It took a little rubbing in a circular motion, but it worked!
I then washed my bottles by hand again, being sure not to submerge the opening, lest any of the baby oil get inside.  Look, sparkling clean!  You know, looking back, I'm wondering if I could have used all natural coconut oil!  Hmmmmm, maybe next time.
Then I took my lovely collection of containers and let them dry on a paper towel.This is a good way to annoy your husband...a favorite, unintentional pastime of mine!
Here's what I do with the empty/cleaned seltzer water bottles. I fill them with water and use them to take to games/practices, etc. I do NOT allow people to drink straight from these bottles though.  I use them to refill our drink cups/sports bottles, etc...I'm sure I'll catch holy hell from someone, but when I get home (if we haven't been anywhere dirty), I'll just fill it back up and put it in the fridge.  If we have been somewhere dirty (football, etc...) I'll bring it home and hand wash it, then refill.
*As you can see in my pictures, I have repurposed some plastic bottles and containers.  I am going to be slowly phasing these out as I'm sure they probably all contain BPA**.  My intent is to move toward glass storage as my budget will allow.   I'm not a tree-hugger, recycling fiend or have an irrational fear of all things chemical, lol.  I'm just becoming painfully aware of the damaging affects my poor diet  and everyday 'normal' items have had on my health over the years and I'm trying to remedy that.

**BPA is controversial because it exerts weak, but detectable, hormone-like properties, raising concerns about its presence in consumer products and foods contained in such products.  A 2010 report from the United States Food and Drug Administration (FDA) raised further concerns regarding exposure of fetuses, infants, and young children.In September 2010, Canada became the first country to declare BPA a toxic substance. In the European Union and Canada, BPA use is banned in baby bottles.

Saturday, December 17, 2011

Soaking almonds for better digestion

Okay, I'm gonna tell you right now that I know just enough to be stupid about this next topic.  On one of the boards I belong to, there has been a lot of talk about soaking your almonds to remove phytates.  What exactly are phytates/phytic acid?  Welp, from what I can gather, it inhibits the enzymes that are used in aiding digestion and can actually rob our body of nutrients.  Almonds happen to be one of the highest foods in phytic acid.  I've been trying to add almonds into my diet daily.  So, I thought....okay, I've been doing a lot more things to cook and eat healthy.  Why not try this?  So, I did. 

 Let's just imagine I have a pound and a half of RAW almonds here, people.  I don't.  What I have is two 12oz packages of DRY roasted almonds.  Not exactly the way you're supposed to start out, but I cannot afford raw almonds at something outrageous like $12/Lb!  Yes, this $8 worth of Aldi's almonds suits me fine. Just be sure not to get the regular roasted almonds that are roasted with oils and other ingredients.  The only ingredient should say: Almonds.
I took the almonds and dumped them into a large bowl, at least twice the size. 
 Then I added a tablespoon of sea salt.  I've heard conflicting things, like add salt now, don't add salt now.  I figure it's salt...what can it hurt? 
 I then covered it with lukewarm water
and gave it a little swirl with my hand to dissolve the salt.
Just set the bowl aside on the counter to soak anywhere from 8 hours
to overnight.  Look how grody the water looks already!  You think THAT looks bad??
This is what they looked like the next morning after I gave them a little swirl with my hand!   Ewwwww!
Dump the water off into the sink. The nuts will be about 50% larger from soaking up the liquid.  Sorry, there's no good way to repurpose this water unless you want to water some outside plants with it??  No clue.  Look how gross that is!!  Rinse the almonds very well to get rid of any remaining water of death.
You can dump them out on paper towels first to pat dry.  This is what I did the first time and it really sped up the drying process.  This time, I just dumped them on the baking mat as shown below.  That took forever to dehydrate.  Don't do that.
In reality, you should dehydrate the nuts at 150 degrees, no higher, or you destroy nutrients.  Since my oven doesn't go any lower than 170, that's what I used.  You could crack the oven door, I suppose.  Dry as long as it takes, stirring and turning over from time to time.  How long will it take?  I dunno.  Depends on how long you soaked them.  My first batch that I patted dry only took only a couple of hours.  My next batch took forever, maybe 8 hours!  You can also do these in a food dehydrator, but I don't have one of those, so please don't ask.  You will know when the nuts are done by testing them.  They should be crisp and have no give to them.  This is the worst picture ever, but they should easily and crispily 'snap'.  Otherwise, they could end up getting moldy before you're done eating them all.  Kinda hard to take a picture of 'snapping' when you don't have three hands. See how dark brown it is inside?  That's okay.
I just put mine in a gallon bag and store in the cupboard.  A pound and a half
of almonds for just under $8.  Not too bad, really.  I put them in my homemade yogurt every day!
So, what does all of this work do for us?  Well, it makes the almonds more digestible.  I do like that they aren't salted because I tend to be sensitive to salt.  I think most everything purchased that is not in its natural form is too salty...because it is!   LOL!  Slowly 'roasting' them like this makes them extra crispy and I really like that. You could always add some salt before dehydrating if that's something you'll really miss.

From what I read, the skin is what makes it harder to digest.  It's there as a protectant to stop the seed from prematurely sprouting, but it also makes it difficult to digest.  Another interesting little tidbit I just heard is that even though they sell almonds labeled RAW in the U.S., it is technically illegal for them to sell raw almonds except for at a roadside stand or online.  So, the ones we might get at a health food store, even though labeled raw, really aren't!  They're flash-steamed or steam-blanched or something like that.  Apparently it's at a high enough temperature that it destroys vital nutrients anyway!  So, I thought....why spend the extra money for those?   Ever notice that when the government gets involved, we always get the short end of the nutritional stick?    For some informational reading by people who really do know what they're doing, click here.
{Printer Friendly Version}

Wednesday, June 15, 2011

Hamburger as a convenience food?

Hamburger...convenience food?  Yeah, right!  What a pain.  At the risk of sounding like an infommercial, here's what sometimes happens to me....I get home from running errands, etc....and I'm in a rush for dinner. I want to have some protein in our meal, so I have to cook some beef...BUT....I forgot to take it out of the freezer, so I have to thaw if first!  That takes too long, so I end up getting pizza delivery (in the old days) or eating peanut butter & jelly sandwiches for dinner. Been there, done that, too many times.  I have a simple solution that works for us.  Maybe it will make your life a little easier, too.

I have been cooking up hamburger and putting it in bags to freeze for years now.  It's so convenient because on nights when you don't have a lot of time, who wants to spend another 20 minutes frying up some hamburger (if you remembered to thaw it, that is)?  Not me!  I'll show you how I do this.

Season ground beef to your liking.
I always put ground pepper, Lawrys and garlic powder in mine.
Chop the beef up with your spatula so you end up with small
pieces.  There's a reason for this.  I'll tell ya later!  :)
See how I let the beef get nice and brown?  This is important.
As Chef Anne Burrell says...browned food is TASTY food!
I let the beef continue to cook even after it's technically done because
I want that beautiful brown color.  If you have fatty beef, you would 
strain your beef at this point.  We buy 93/7 for about $2.36/Lb in a ten
pound tube every day.  You can sometimes get it on sale for even less.
Because it has so little fat, I don't even have to drain it.  That extra
browning that I do tends to dissolve any excess fat from the pan.
Set your pan aside for a few minutes to cool a bit.  It doesn't have
to be totally cool. And of course, you don't want to leave it out
too long where you enter the 'danger zone' as far as temperature goes.
Just make sure it's not so hot that it will burn a hole in the bag.
Ask me how I know this.  Dump it in a gallon sized zip-top bag, 
push out the air as best you can and slide shut.
Pushing up from the bottom, pat the ground beef down to fill
the empty space in the bag, working your way to the top.
Flatten out as much as possible.  Let out excess air, if any.
Place in your freezer flat, just like on your counter top.
When it is frozen, you'll have a nice brick of beef like this...
Roll the bag over to break up the pieces.  
Turn the bag a quarter turn and do the other way.
Wonder why your right hand looks so 
much fatter than the left while doing this.  
Silently curse your parents for passing on fat genes!
Shake beef to the bottom of the bag.
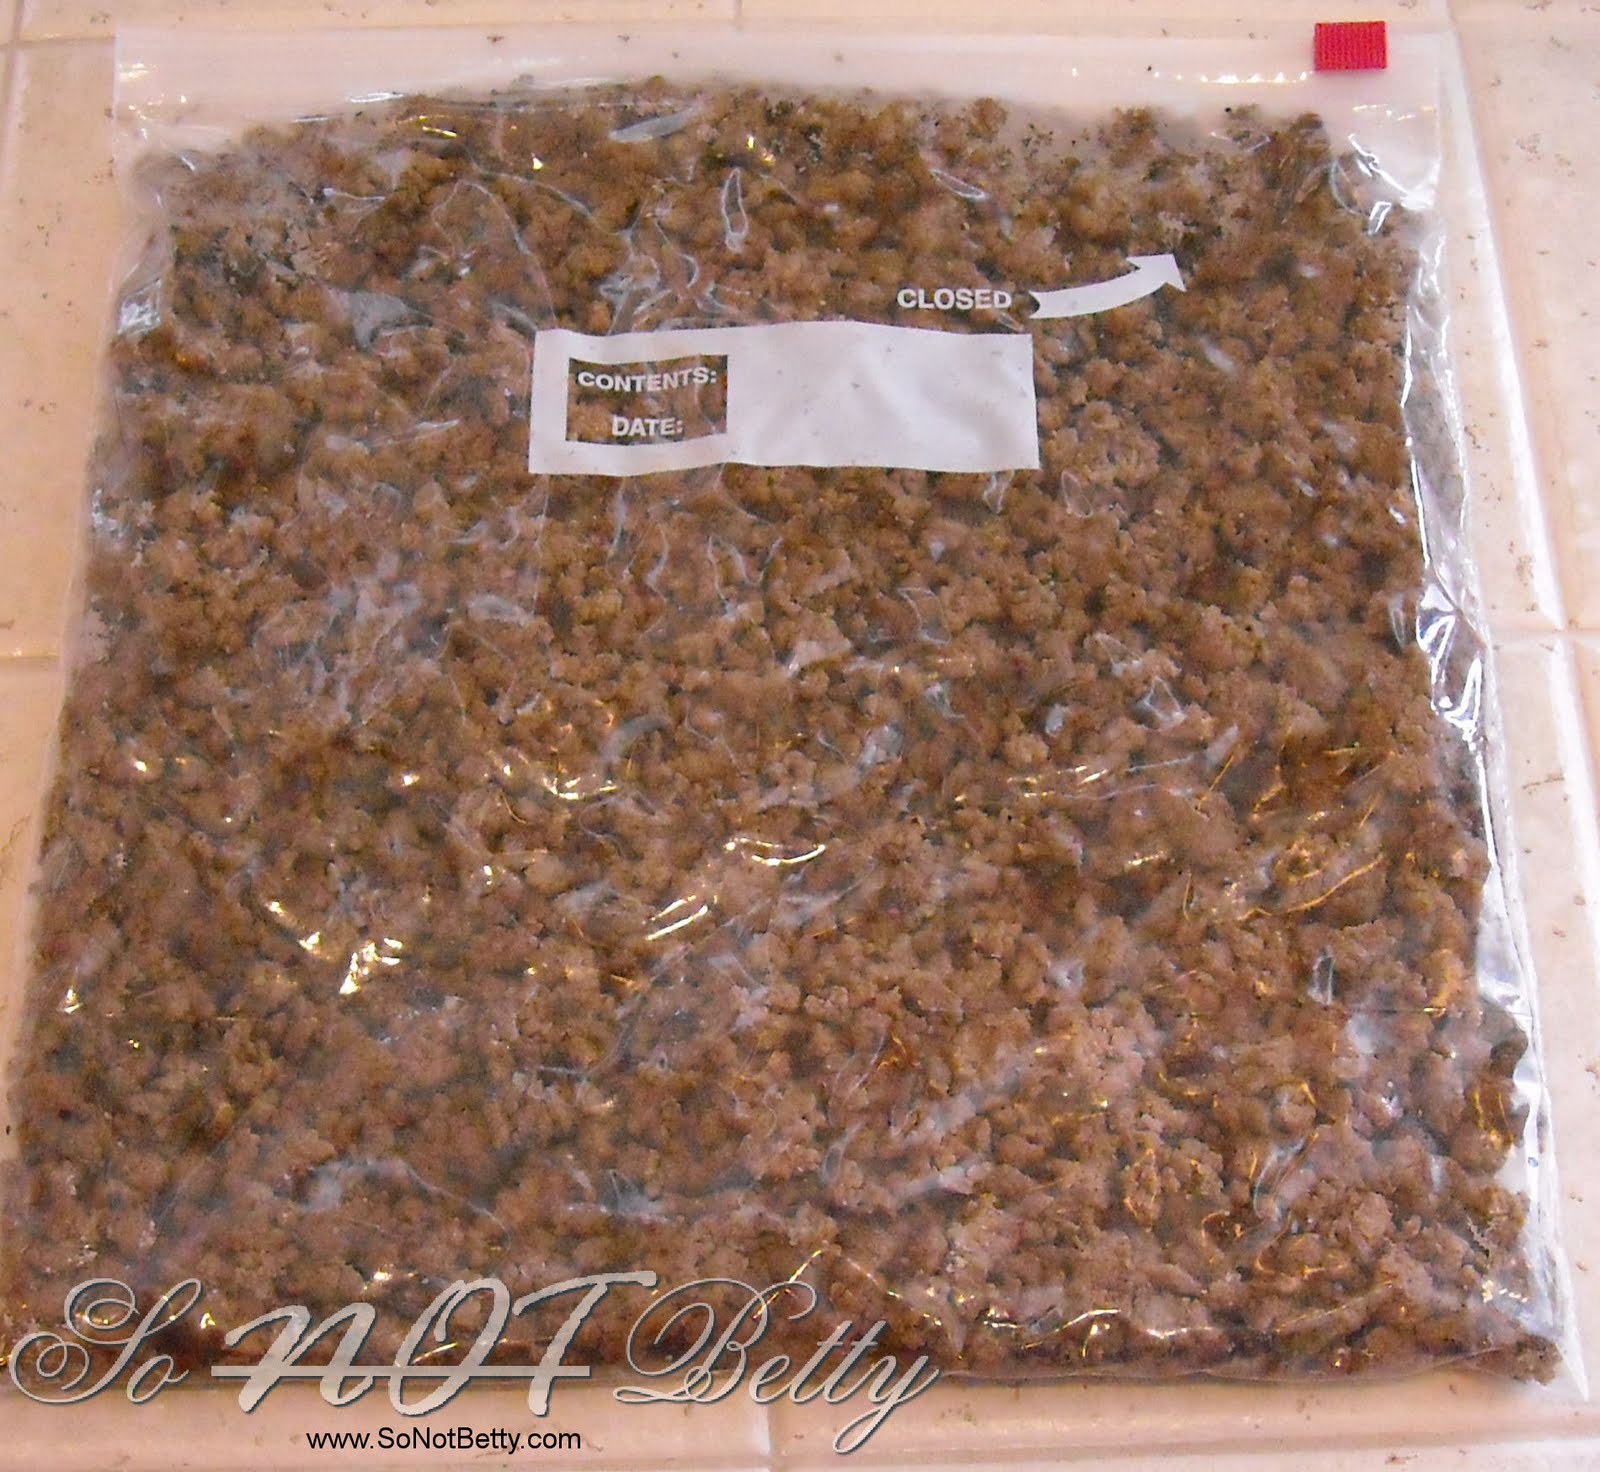
Take a look!  A nice bag of cooked, crumbled and seasoned
ground beef that you can throw into any recipe!
You're a culinary genius! Zip shut and throw in the freezer!

Notes:
I usually do this when I'm already cooking hamburger for a meal anyway. I figure,if I'm cooking it anyway, I may as well cook some more!
I keep this in the freezer and use as needed.  I usually just dump it in whatever recipe I'm cooking without measuring.  I just eyeball it.  (Don't tell my husband, but if the recipe calls for 1# of beef, I usually put only about half because sometimes it's just too much beef for my and my son's tastes.  Hubby doesn't know the difference and I don't tell, LOL!)   This saves me soooo much time on meals.  We use it on homemade pizza, tacos, Hamburger Helper, sloppy joes, spaghetti, casseroles, etc...

It's also nice if you live alone because you can just take out enough for one taco, etc...It's pre-seasoned with spices that lend themselves well to most any recipe. 

When my supply gets low, I just start again.  We buy the hamburger in 10Lb tubes usually.  We just take out a couple of pounds for me to brown, then portion the other 8 pounds out in one-pound packages, vacuum sealing the rest, labeling and freezing.  The frozen packages thaw easily because they're nice and flat.

{Printer Friendly Version}