Friday, December 30, 2011

"Olive Garden" Italian Dressing

Here's another dressing I whipped up the other night.  I've had this recipe in my stash now for years, but I've never made it.  I can't say from whom I got it, but I would bet it was online somewhere.  It's a pretty darn good likeness to the yummy dressing at Olive Garden!

You'll need:
1/2C White Vinegar
1/3C Water
1/3C EXTRA Light Olive Oil...the regular is too overpowering
1/4C Corn Syrup (CRINGE!!!)
2 1/2T Grated Romano (I only had Parmesan)
1 1/4t Salt
1t Lemon Juice (I felt it really didn't need this.  Will omit next time)
1/2t Minced Garlic
1/4t Dried Parsley
Pinch Dried Oregano
Pinch Red Pepper Flakes


Start by grating your cheese and your garlic into a measuring cup.
Toss in rest of ingredients, mix.
Looking back, I should have just done everything in the mini food
processor, rather than dirty up a measuring cup.  Sorry 'bout that.
Anyway, pour into your food processor or blender and mix it up.
It emulsifies well and actually stays mixed for days!
Transfer to container of your choice.  In my case, a skanky-looking
old lemon juice bottle that I've repurposed.  I knew I kept that for a reason!
Throw it in the fridge for the flavors to meld for a while.
Notes:
This was really good!  I thought it could do without the lemon juice though.  It just seemed a bit too tart.   I'll also use real sugar or Truvia next time rather than corn syrup.  This was really easy to throw together and should last a good long while in the fridge since there's really nothing to go bad in it.  The salad I made to go with it was very similar to Olive Garden's in that it had thinly sliced red onion, black olives and tomatoes in it.  I didn't have any pepperoncini.  This was really tasty and I would definitely make it again!  If you leave out the corn syrup and use XLight Olive Oil instead of Veg oil, it's really healthy for you, too!  Makes about 1 cup, or 8 servings.
{Printer Friendly Version}

Creamy Italian Dressing

When we had family over for the holidays, I wanted to make a few homemade dressings to go along with our dinner salad.  I knew they enjoyed both Italian and Ranch dressings .  I also knew they were used to the store-bought dressings and that it can be hard to switch to homemade.  With the Standard American Diet (Ironically, the acronym spells SAD), we can become used to the really bad sugar/high fructose corn syrup/preservatives/chemicals in everything.  When you have something homemade without all the chemicals, it's not always a pleasant experience for the person who is used to the store-bought stuff, especially if you make your own mayo.  I have yet to conquer that and have it taste/look good, sigh.

I already have good Italian and Ranch recipes, but I thought....hmmmmm, maybe a creamy Italian might be nice, too.  I found this recipe on Allrecipes.com.  It's somewhat unusual, but it tastes pretty decent. Kinda reminds me of the dressing I make for my broccoli salad, but with Italian seasonings.  My cousin ate two helpings, so I'm assuming it was good!  My uncle used the last bottle of store-bought ranch I ever plan on buying. (Actually, I'm using it to wean my child into using the homemade one). Didn't even try my homemade stuff, harumph!  My aunt, my husband and I opted for my "Olive Garden" Dressing.  I liked that I could serve good tasting homemade dressing without all the added crud I can't even pronounce.  Even if my mayo wasn't homemade, it's still a much healthier option!  Here's what you'll need:
1C Mayonnaise (Not Miracle Whip)
1/2 Small Onion, grated
2T Red Wine Vinegar
1T Sugar (or sugar substitute)
3/4t Italian Seasoning
1/4t Garlic Powder
1/4t Salt
1/8t Ground Black Pepper
Xanthan Gum (pictured, but not used...I thought it would need to be thickened...it didn't)

Start by grating your onion into a bowl.  I couldn't manage to take a picture while doing it, so here's the finished product. I used 1/4 of a large onion.  This is the hardest part of making the dressing, really.
Next, dump in all of the other ingredients.  Hard, huh?! 
And lastly, mix!  That's it!  Super easy and cheap!  Sure beats running to the store to pay 5 times as much for a nutritionally inferior product, doesn't it?
You can pour yours into a nice little dressing container like I did.
Don't forget to label it and put the date on it. Painters Tape works well
for this as it removes easily.    This made a little more than a cup and serves 8.
Refrigerate at least an hour or two to let flavors marry.
The only thing I thought this recipe needed was perhaps to be blended to smooth out the teeny tiny lumps of mayo.  But I was in too much of a hurry for that.  I had company coming!

This should last at least a week, maybe two in the fridge.  My guess is that if you lacto-ferment it first, it'll last a long time.  But as previously stated, I'm still too leery to dive head first into that pool.  Still doing my homework on that subject!  When I know more, you'll know more, I promise!

"Secret" Chocolate Carrot Cake

Well, I thought this was a secret recipe only my mother knew, so out of loyalty I've never shared it.  But when I googled it, I came up with 7,730,000 posts!!!!  Yes, seven and 3/4 MILLION chocolate carrot cake recipes out there!  Within the first 4 clicks, I realized that this recipe is the same as many many many of those flying around the internet, except some use chocolate and nuts in their frosting, which actually sounds good!  Alas, the 'secret' is out.  That being so, and the fact that I only have 5 followers, I feel pretty safe putting this out there now.  Sorry, Mom.  It's not quite as special as we once thought, sigh.  This recipe is by NO means healthy, but heck, it's the holidays!

Here's what you'll need:
Cake:
2C Sugar (palm sugar would make it a little healthier)
1/3C Cocoa (I might try 1/2C next time!)
2t Cinnamon
2t Baking Soda  
1/8t Salt
1 1/2C Veg Oil  (next time I'm using Extra Virgin Coconut Oil)
4 Eggs
3C Grated Carrots

Icing:
12 oz (1 1/2 Pkgs) Cream Cheese
1 Lb (3 1/2C) Powdered Sugar
1 Stick Butter
2T Vanilla (I like a LOT)

I think it's probably best if we start by grating our carrots.
You need enough to make about 3 cups, which is about a pound.
I washed and peeled them first, then grated them.
Please do NOT try to save yourself time by purchasing pre-shredded
carrots.  You'll pay 4 times as much and they'll be dessicated and gross.
Then, when you throw them into your cake, they'll act as little sponges, 
sucking all the moisture from your cake.  Don't be lazy now!  It really
did only take a few minutes by hand.  Much easier than dragging out 
the food processor...and much easier clean-up, too!  I started with a 
paper towel around it to protect my fingers, but soon found out it
was really annoying and not very helpful.
When you get down to the little nubbins, give them to your dog.
They love carrots and it's good for them.  Yessssss, my dog is
wearing a Super-Sissy costume complete with cape.  Why do you ask?
Set your bowl of grated carrots aside for now.
 Dump all of your dry ingredients into a large bowl
and stir with a fork to combine.
Next, add your oil and eggs.  Beat to combine.  OMG, all that oil!
Had I been thinking ahead, I probably would have tried coconut oil
or melted butter.  Maybe next time.  Of course, with all that sugar
and flour, there's no making this cake healthy, lol!
Add carrots last.  Your batter will be very thick and unusual for a cake batter.
This is how it should look.
Stir in your carrots.  Oh, wait!  This has carrots!  Does that put
it in the vegetable category, thus making it an allowable diet food?!
No?!?   Darn!  It's always something.
Next, we'll prepare our pan for baking.  Dump the butter you'll use
for your frosting into a clean, medium sized bowl.  Save that butter wrapper!
...and use it to grease your 9 x 13 cake pan!  See how much was hiding out on that wrapper!
Dump in your thick batter and smooth it out.
Pop in a preheated 350 degree oven for 35 to 40 minutes or until
a toothpick in the center comes out clean.  Mine is usually closer to 35 min.
This is not a cake you want to over-bake because it can get dry.  Better
to err on the side of under-done than over-done.
Okay, now while that bakes, we'll get back to our frosting!  Remember
that stick of butter we set aside in a bowl?  Plop all of the other icing
ingredients down right on top of it!
And then slowly beat them together, making a huge mess.  If making
the icing ahead like I did, cover it with plastic wrap and leave on counter until ready.
When cake is completely cooled, plop globs of the icing on top. 
This makes it easier to spread without damaging the cake.
And spread out evenly, or make a pretty design if you want.  At this point, you could add some chopped walnuts or even some chocolate chips if you want. I haven't tried either.  I love this cake without any extras.  If there's one small thing I'd change, I think I'd cut the icing down a third, or maybe even half. But then again, I'm not a huge icing fan in general.  My hubby loves the 3/4" high goo! Serve it up and refrigerate any extras.  I honestly don't know if it HAS to be refrigerated, but that's just what we do because of the cream cheese.  Well, that and because my husband loves all/any cake cold, which is weird.
I can't believe I forgot to get a picture of a slice of this cake!  We still have some, but I'm afraid if I take a piece out to photograph, I'll have to eat it, LOL! I've done really well at avoiding it the last three days, which is difficult to do!  It's not exactly in the 'diet' category.

Let me know if you try this cake for yourself. I think you'll love it...even if you don't like carrot cake!  It doesn't have any of that stuff like raisins, coconut or pineapple in it.  Not that that stuff is bad in and of itself, but I think it'd just ruin this cake's perfect balance. Seriously, leave it out.

Thursday, December 22, 2011

Coloring your own hair at home

I have a confession.  I have NEVER had my hair dyed professionally (and it probably shows, LOL!).  I just cannot see how people go every six weeks and drop $60-80 bucks!  First of all, I could never afford it and secondly, it's insane and indulgent! 

Last year, I finally broke down and realized that my white hairs were really starting to age me, big time.  I didn't have a ton of them, but enough where I noticed it.  I used to say that I'd start dyeing my hair when someone looked at me and said, "Uhhhhh, I think it's time to color, honey."  LOL!  Looking back, no one could possibly be that rude.

So, one day, I just decided to do it.  Maybe you already know how to color your own hair.  Or maybe you've never done it or are afraid to.  I was.  But I did it and I'm really happy with the results!  I'm going to show you how to do your roots.  This will be different than if you were changing your hair color entirely.  I have previously dyed my hair this color and my roots have grown out.  I was very lucky to find a color strikingly close to my own, yeahhhh! (The flash from my camera makes it look a lot lighter/redder, but it is really close in real life) That makes it nice when it starts to grow out.  You can barely notice it.  It has what the lady at Sally calls "a nice fade".  So, let's dye our roots! Whhheeeeeeeeeeeeee!!!!

Here's what you'll need:
2oz Hair Dye of your choice (I used L'Oreal Chocolate from Sally Beauty Supply)
2oz Developer
A packet (or a bottle) of that really good after color treatment stuff by Ion (get at Sally)
(It's not pictured because it's in the shower upstairs.  I use it every day though.)
Two skanky (25 year old) towels (no, really...they're that old)
One of your husband's pit-stained and torn ready for the trash t-shirts 
(I'm currently wearing it, so it's  not in the picture)
Rubber Gloves
Color Applicator Bottle
Long hair band to tie towel around neck/shoulders (clips never stay)
Color brush thingy dingy (the aqua colored thing, lol)
Vaseline (optional...I always forget it)

A few important things to know before coloring.  At least this is my experience...
Start by gathering your supplies as shown in the picture above. You want everything together because you do NOT want to have to be searching around for something with dye all over your hands.  Trust me on this one.  

You will also want to start with combed or brushed DIRTY hair.  Yes, dirty.  I know, I know....all of the store-bought dyes say to start with clean hair nowadays.  This is a mistake in my opinion. All it does is end up dyeing your SCALP the same color as your hair and doesn't wash away for a couple of weeks!  If you start with dirty hair, the natural oil in your scalp will repel the dye from staining your scalp.  Now, if you have insanely oily hair where you feel it will keep the dye from dyeing your roots properly, then you may want to wash and dry a few hours beforehand.  I find it just makes my hair more dry and crispy, an undesirable side effect.  

I buy all of my hair coloring products at Sally Beauty Supply.  They have great sales and coupons, so take advantage of those.  They also have a membership card that costs something like $5 a year, but they immediately give you the $5 back on your first purchase.  A 2oz bottle of my hair dye (L'Oreal Chocolate), costs me about $5, if memory serves.  I buy the big bottle of developer because it is insanely cheaper.  I got this huge (24oz) bottle of developer for $2.99!!!  That's the same price as the little ones!  So, look for the sales.  As for the little brush deal, the gloves and the applicator bottle, once you have those, you have those.  You just keep using them over and over.  And lastly, the after-color treatment conditioner (that I LOVE)...I think it's called Hair Restoration, but I know it's by Ion and has the red label...I got on sale for $7 (half off) for a HUGE 32oz bottle that will last me forever.  

Once you designate your skanky hair dye t-shirt and old towels for hair coloring only, you never have to buy them again!  I just wash mine either by themselves when I'm done, or with BLACK clothes only.  If you are lightening or bleaching your hair rather than coloring darker, you would want to wash them together only.  Okay....we ready?  Let's go!

Start by putting on your skanky t-shirt and wrapping the towel around your neck and shoulders, like a shawl. Tie the hair band around the ends to hold in place.  Trust me, clips NEVER stay.  Besides, you look sexy this way!  ;)
Add 2oz of your developer and the entire 
2oz bottle of hair dye into your Applicator Bottle.
See that note on my bottle of developer?  That tells me how long to leave on my roots 
and how long to leave on the rest of my hair. It took lots of experimentation to get this equation
right.  The lady at Sally told me the biggest mistake people do is to not leave the dye on their roots 
long enough and leaving the dye on the ends too long.  This makes them end up with orange-y
roots and dark brown/blackish ends.  Been there, done that.  Nothing worse than spending the time and money and not even have your greys covered, grrrrr!  Sidebar: what works for me may not work for you.  I just happen to have incredibly defiant white hairs, so it takes mine an hour and a half to get them covered.
I put this note on there because I can NEVER remember between colorings! 
Put the lid on your color applicator tightly. Slip your gloves on and place your finger over the hole of the lid.  Give it a good shake to mix it up well.  The color of the goo will be much different than how it comes out on your hair, so don't let that scare you.
Starting at the front, middle of your scalp, gently squeeze the bottle and drag it back toward the nape of your neck.  I go down one side, then the other. OMG!  I can't believe how much hair I've lost!  Arghhh!
Let's just ignore the box of Epsom salts behind me. My son plays with it in the tub.  He's easily amused!
When you're done, your hair will be somewhat 'slicked back', but resist the urge to run your gloved hand over it, smoothing it down.  Right now, we want to concentrate only on our roots.  If you pat down that little bit of hair that is sticking up, it will get dyed much darker than your roots because it's more porous than the outgrowth.  Keep your other towel handy should you have any drips on your face.  Ohhh, I forgot.  That optional Vaseline mentioned above?  If you want, you can run some along your hairline to ward off staining of your skin.  I always forget.  And yes, I always stain my face somewhere, lol!  It goes away in a couple of days..or if you scrub the crap out of it in the shower with a washcloth and shampoo.  Set your timer for the minimum time indicated, or for the amount you know works for you.  I'm setting mine for 90 minutes.  Now, go do some relaxing, reading, post on your blog, etc....Just keep that towel on so you don't drip anywhere.  Be careful if you sit on your couch or anywhere it can stain. I tend to go to my computer where I can do the least amount of damage.  Oh...I also take any bathroom rugs and lay them over the tub.  I have accidentally dripped on them before (they're cream colored...ugh!!), but if I drip on the floor, I can quickly clean that up with a wet tissue.  Be sure to wipe up any spills/splatters immediately.  Here's what I use that little brush thingy for.  To smooth back the hairline, being sure the dye is covering those whispy little hairs that somehow escape being dyed if you're not careful. Although it may appear I am dragging the brush all the way back over my head, I'm only bringing it back about 1/2" to 3/4".  It can also be used between 'rows' of dye should you let your outgrowth get out of control (i.e. anything over 3/4"). Be sure to wash your gloved hands, getting all the dye off of them.  Dry them on your second skanky towel, pull them inside out and lay them on the skanky towel until later.
When your timer goes off, you will notice the color of the dye has changed significantly.
Mine looks kinda blackish purple in real life.  Kinda scary the first time you do it.  Now, we will dye the rest of our hair.  You need to work quickly so it doesn't get too dark.  Liberally squirt the rest of the dye all over your head.  I could only take a picture of the front while doing it.  Didn't want to take too much time and I had to take the pic before I got dye all over my gloves. 
Make sure you get it all the way down to the ends.  Squish, squash and mix around well.
Then pile on top of your head if you can.  
Now, logic would say to set your timer for the remaining 5 minutes (or however long your hair requires), but I just wash my gloved hands really good, dry them off, take off the gloves and set in the sink with the used applicator bottle.  Then I grab my 2nd skanky towel and head to the shower.  Of course, I couldn't take pictures of that, nor does anyone want to see that, but I basically just take my shower while rinsing my head off at the same time.  I am sure to tilt my head back toward the shower head, letting the dye run down the back of my head and not toward my eyes.  When I'm fairly certain the majority of the dye is rinsed out, I continue on with my shower as normal, being sure to end with my after-color conditioner.  That stuff makes your hair feel so silky and smooth.  I use a tiny bit every single day because the dyeing process really hits my hair hard. Probably because I have to leave the stuff on so long to cover my grays!
Be sure to keep your 2nd skanky towel RIGHT NEXT to the shower.  When you're done with your shower, grab the towel and quickly wrap up your hair.  If you use one of your good towels, guaranteed, you'll stain it.  Then use your good towel to dry your body. Man, this sure seems like a lot of explaining for hair dyeing, lol!  Dry and style your hair as usual.  Here's what mine looked like after blow-drying alone.  The flash makes it look red and two-toned, but it's not.  It's a nice deep brown with red undertones.  I like it!
And here's another view that shows the color is more even.  Can you say "Cousin It?!?"  LOL!  
I know it might look a little different in color closer to my chin, but that's just the layers in my hair. 
Man, it's hard to take a picture of the side
of your head when you can't see!  You don't get the full effect when
I take a pic from the front.  Not to mention, I'm the world's most unphotogenic
person...aside from my mother in law and brother in law, Jim, LOL!  Finally, someone worse than me!!  Whoo hoo!  Oh, the things that excite this old broad!
And finally, a pic to show that my grays (well, WHITES in my case) were covered well.  It's amazing how different the color looks at different angles.  I couldn't seem to get a good pic of my grays beforehand, sorry.  The important thing is that there aren't any, right?   I'll do this again in about 2 months.  Not bad for about $6 bucks!  That's about 90% (or  more) savings from those who get it done professionally.  (Damn fools. Okay, unless you're rich....my apologies)  Oh, I also wanted to mention that the stuff from Sally is wayyyyy better than the store bought hair dye.  I've tried both and can attest to the fact that a box damages my hair big time.  It also came out very FLAT from a box whereas this stays shiny and vibrant longer.  AND...best of all....it's cheaper!

So, hopefully I've helped you get the courage to try dyeing your own hair at home.  It's cheap and it looks great if you use good products.  My guess is that most people know how to do this already, but honestly...when I walked into Sally the first time, I had NO CLUE what to buy!  I knew I'd need gloves and hair color, but had no idea about the developer, how much to use, etc...The little bottles you buy there just don't tell you. So maybe my trial and error will save you some grief should you delve into the DIY world!


Easy Chicken Marsala

Today I'm going to show you how to make one of my hubby's favorite meals, chicken marsala.  I have no clue if this is traditional or what.   I winged it a long time ago, we liked it, so we kept doing it this way.  Here's what you'll need:


Chicken Breasts, boneless, skinless (mine are about 1 1/3#)
Small pack of Mushrooms, diced
3T Butter
3T Olive Oil
1/2 Medium Onion, diced
1C Flour + 2T
1t Salt
1/4t Pepper
2t Garlic Powder
1/4-1/2C Marsala Cooking Wine (mine's really cheap and it works great)
1/4-1/2C Cream
2C Homemade Chicken Stock (forgot to put in picture)

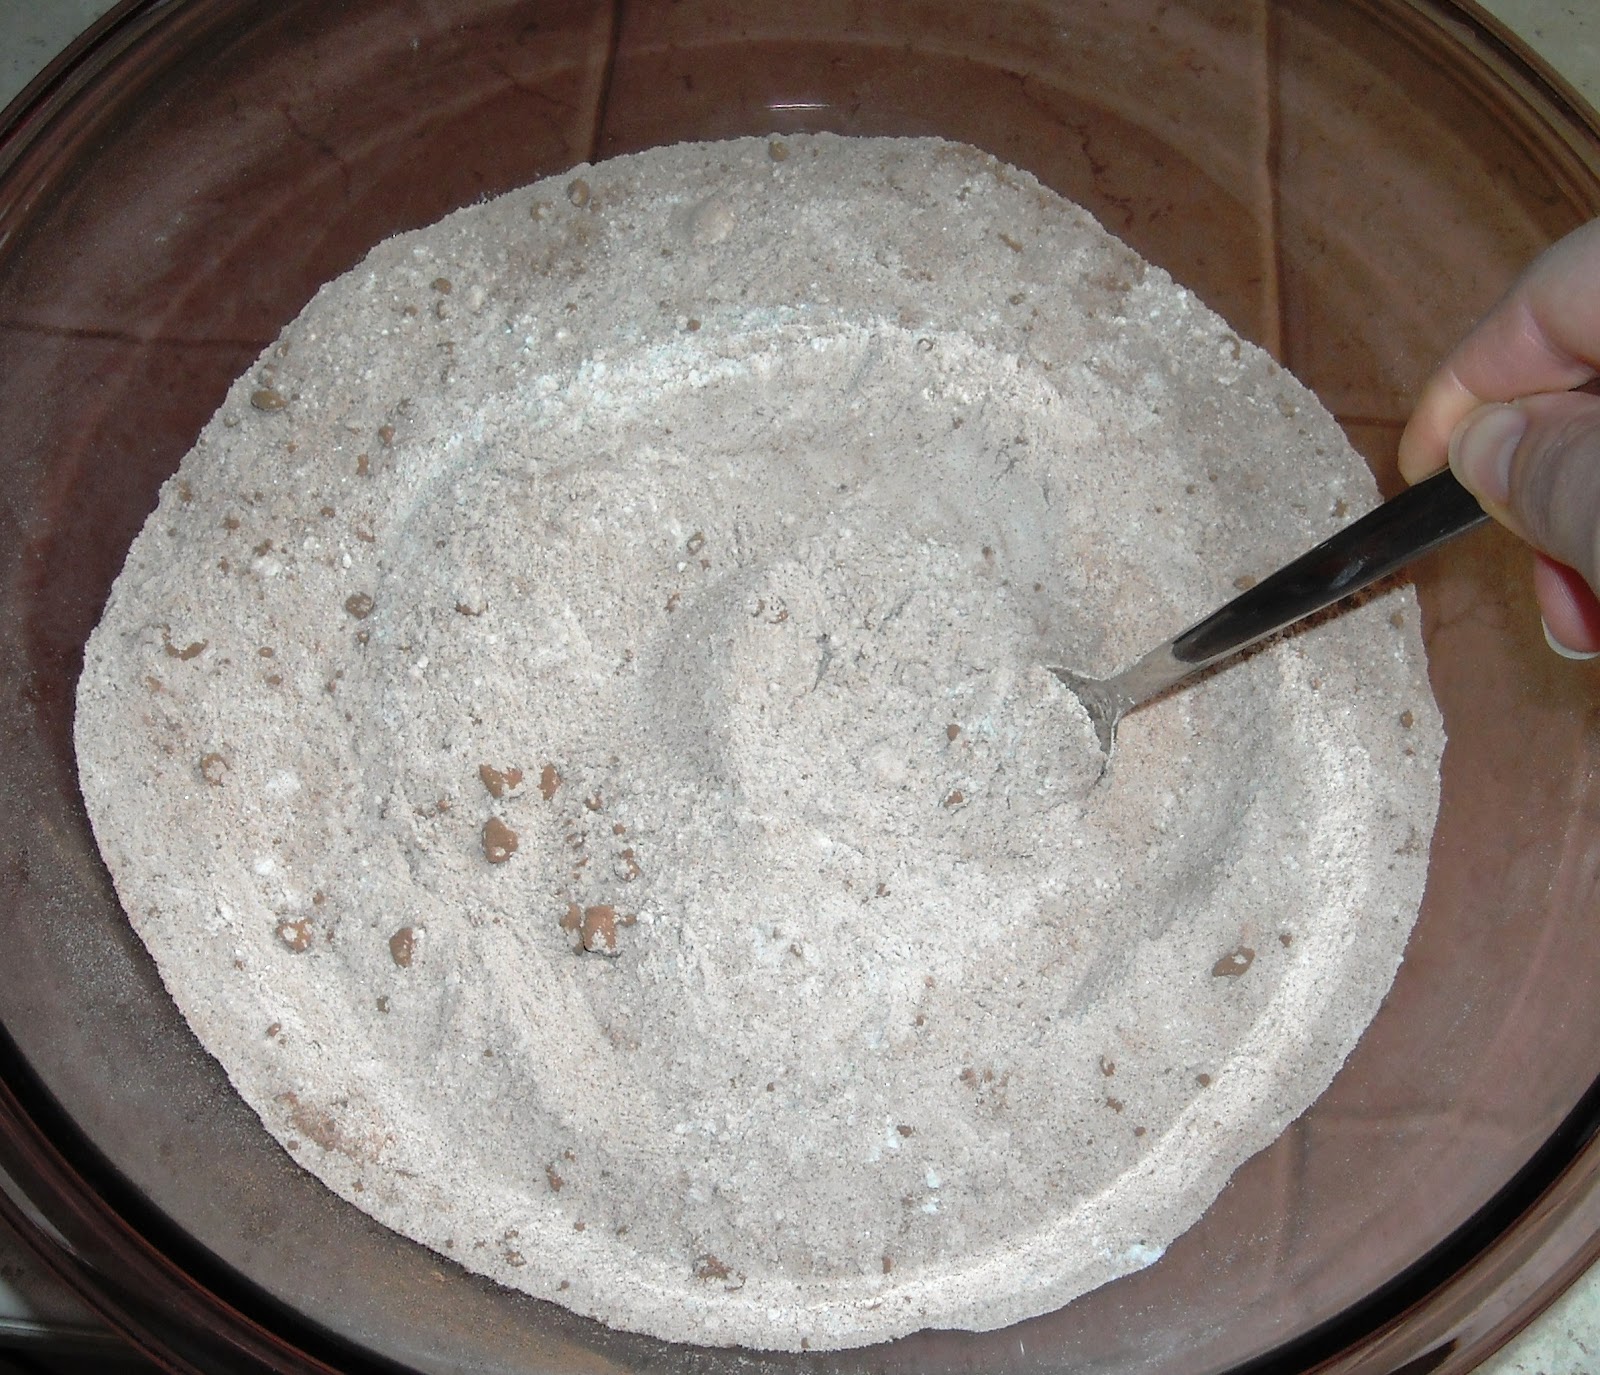
Before getting your hands all chicken-y, pour your 
flour, salt and garlic powder in a shallow dish.
Mix with a fork and set aside.
Place a chicken breast in a gallon baggie and close the slider.
Man, look at the size of that baby!  This must've been the Dolly Parton 
of all chickens!  Hubba Hubba!  Har de har har!
Using the flat side of your meat mallet, pound the breast thin. 
See how grody and dull my meat mallet is?  
That's because I washed it in the dishwasher.
Apparently, you're not supposed to do that.  No one told me.
I usually pound the hell outta mine, taking out my aggressions,
before I notice I've smashed it perhaps a little too much. If you do
this, it may fall apart on you a bit.  That's okay, you can just take
those small pieces and make 'nuggets' out of them for the kids.
To make things easier on me, I just cut mine into quarters.  
Now, let's get our pan ready.  In a large pan (mine is at least 14", maybe even 16"),
place your butter and olive oil over medium/low heat.  The recipe above calls for
3T of each butter and oil.  As you can see below, I used 4 of each and it was a little
too much, so please follow the recipe.  I've learned recently that you really shouldn't 
heat up Olive Oil or it loses its nutritional value.  But I figured even EVOO that has
lost nutritional value is better than using vegetable oil that had none to begin with.
Had I been thinking, I should have used coconut oil (the unscented/unflavored kind).
Using tongs, dredge your chicken pieces in the flour mixture 
one at a time.  Turn over to coat the other side.  Shake off well.
We're not trying to create a fried chicken crust so much as a little
dusting that will make our chicken crispy and yummy.
Place your chicken in the hot oil to fry.  Now, most recipes
you see will tell you to cook 4 minutes on each side.  Mine is 
NEVER done in 4 minutes.  Ever.  Mine usually takes about 10
on each side.  I suppose if you were to partially cook it, then
finish it in the sauce afterward, the 4 minutes would be fine.
We like ours good and crispy, like this!  This is when I turn mine over,
when it's golden brown.  Mmmmmm, mmmmmmmmmnnn! Turn over
and cook until the other side is done.  Do your 2nd batch as well, if you have one.
Set on paper towels to drain while you prepare your sauce.
See those yummy brown bits in the bottom of the pan?  Don't get 
rid of those!  We need those to help flavor our sauce.
Using the remaining butter/oil in the pan to saute,
throw in your diced onions and mushrooms.
Saute until brown and soft.  We like things browned around here.
Sprinkle in a couple of tablespoons of flour.  NOT from your earlier mixture,
please.  It's contaminated with raw chicken germs, remember?  
Yes, I'm a germaphobe.  Thank you.
Mix well and cook for a few minutes to get the raw taste out of the flour.
It will all clump together like this.  That's okay.
Working in small batches, add in your chicken broth, stirring constantly.
I do it slowly because this eliminates lumps.  Pour, stir, pour, stir and so on.
I'm actually using bone broth that is very nutrient-dense and healing.
I didn't make a tutorial on it because I made it quite by accident one day.
As you stir, scrape the bottom of the pan to deglaze it.  This will
get up all those yummy browned bits and add tons of flavor to our sauce.
If your sauce is too thick, add some more stock (or even water).
Let your pan sauce come to a simmer. It will thicken up when it simmers
Your pan sauce will look something like this when it thickens.
Add in 1/4-1/2C of your marsala now.  Taste it and see if you need
more.  It's all based on how much you like.
Now, some people add the chicken back in at this point and turn the heat to low.
For demonstration purposes, I did, but I usually don't because
it's a bunch of switching stuff around.  If you par-cooked your chicken
earlier, you would need to do this.  At this point, I would cover it with
a lid and let it simmer until the chicken is fork-tender.  I've done both ways.
Just depends on what I'm in the mood for and how much other stuff I 
want to cook while the chicken takes care of itself.  The longer you let it
go, the more concentrated the sauce will get.  Keep an eye on it.
I totally forgot to take a picture of the next part, but at this point,
you would remove the chicken to a plate, take the pan off the heat,
and add in 1/4-1/2C of heavy cream.  Just to taste.  Mix well and
pour over your chicken and whatever else you are serving.  In this case,
my hubby made FAKE mashed potatoes from a box that I refused to eat, LOL!
Blech!  We did have a veggie, but didn't have it ready yet.  Anyway,
you get the idea.  I always salt/pepper to taste afterward on meals like this
because pan sauces can become quite salty after they reduce, 
especially if using store-bought stock. Don't waste your money on it.

Notes:
I titled the post as 'easy', which it is.  However, this can be a bit time-consuming depending on how much you make because you have to cook it in batches.  The end product is worth it though!  I made this whole batch of chicken marsala (8 pieces/2pcs per serving) for about $5.00 (including the sauce, but excluding the fake potatoes) and it fed 3 people.  It should have fed four, but my husband ate enough for two people, lol.  The chicken only cost $3.31 and there was 1 1/3 pounds in there!  Those chicken breasts were huge... about 2/3Lb (10 1/2oz) each!  Using homemade stock really helps to save on money and is very good for you.  Give it a try sometime and let me know what you think!