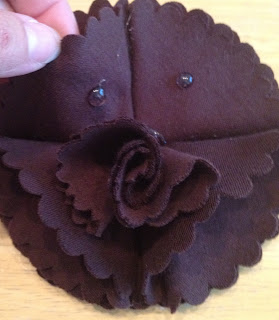
LOVE this one!
Here's what you need:An old shirt
Glue Gun/Sticks
Scissors
2 Punched Circles (mine is 1 3/4" and cut from a cereal box type of material)
Hand Drawn Template or in this case, a Sizzix die
Start by cutting off the sleeves and top part of the bodice, just under the arms. We can save the bottom portion for another project! This shirt was actually purchased about 4 years ago, but I have never worn it! It's always been too big and dumpy looking, so I might as well turn it into something useful!
Cut out little portions of the bodice and sleeves to cut your flowers out of.
Run them through your die cutting machine. You will need 9 flowers.
If using a paper template, just pin it to your fabric and cut around it. This was made using a punched flower that I increased in size with my scanner/printer and cut out.
So, now that we have them cut out, we need to start assembly. Take a flower and fold in half.
Then fold in half again.
Apply a bit of hot glue to one of your cardstock circles and glue down four of your folded flowers, meeting
in the center.
Gently open the flap to the middle of each flower and put a spot of glue. Lay flap back down.
Fold four more flowers and glue down in a similar fashion, this time turned an 1/8 of a turn.
After inspection, I decided the glue should go along this edge rather than in the center. I could be wrong. I frequently am!
Fold your last flower in half
Then roll up one side
Put a little line of glue in there to hold it shut.
Then cut off about 1/2" from the pointed part.
Then take some glue and put it on your flower base like so.
Put the bud in the center and push down.
Before the glue cools, pull up the petals toward the bud so they attach.
I felt like I needed to hold the center of the flower down a little just as an added precaution.
Deciding my flower was looking a tad flat, I opted to put a little more glue here and there. I think it had to do with the weight of the fabric.
Having no clue how I was going to clip this thing to my scarf, I came up with this solution. Punch out your 2nd circle as follows.
Then glue it down on top of your first circle. See, you have a little place to slip a hair clip under there! Sometimes I amaze myself. Most of the time not, lol.
And there you have your little flower poof to dress up your scarf! Hmmmm, this one is a little big. But for my first try, it's not bad. Kinda hard to see the detail in the picture. Can't wait to try the peach colored one.


Very cute and looks easy enough to make, thanks!
ReplyDelete