Friday, December 16, 2011

How to make inexpensive yet thoughtful Christmas gifts

Some of you may not know this, but I am a Stampin Up demonstrator.  Yup, I have an different blog dedicated entirely to that.  Because I thought these were a little more thrifty than just "Stampin UP-py", I thought I'd share this idea here.   I made a dozen Santa ornaments for about $1 each!  These are a really nice idea for friends and neighbors when you don't have a lot to spend, but want them to know you were thinking of them over the holidays.  Here's what you'll need:
Supplies:  (Sorry, forgot to take a picture of about half of everything!)
Cutting Mat
Xacto Knife
Scissors
Pen/Pencil
School Glue
Hot Water
1" Square Punch (or cut freehand)
Ribbon
FINE Glitter (the chunky stuff looks ackkky!)
Glass Ornaments
3 (or more) plastic/paper cups
Glue Runner
Paper Towels
Shimmer Paper (Gold or Silver Cardstock would work, too)
1/2" Circle Punch
2 Small Funnels

Start by pouring some glue in the bottom of a cup.  Not necessary to measure.
 Turn your tap to HOT.  Let it get really hot, then add about 4 to 5 times as
much water as you have glue.  I didn't measure this either. 
 Stir, stir, stir, for about a minute.  You don't want any clumps left.
The original 'recipe' for this called for using Floor Wax.  I didn't
want to have to buy an expensive bottle of wax that I'd never use,
so I tried this instead.  Worked great, cost pennies!
Remove the cap of your ornament.  Set cap aside.
Be careful, some of the glass tops are really sharp.
 Place a cup on a paper towel.  Place the ornament in the cup.
Using a funnel, pour in your glue mixture.
Gently and carefully swirl it around, 
covering the entire inside.
When you get close to the hole, you'll want to hold it over another
cup and continue turning the ornament.  This will coat the narrow
opening of the ornament while you pour out the glue.
If you haven't gotten any glue splashed on the sides of this cup,
you can put the ornament upside down to drain in this cup.  If you
do have glue on the edges, choose a clean cup.  Let drain for a few
minutes. After I made this tutorial and continued on with the rest of my
ornaments, I figured out that if you gently tap the ornament against
your hand (over the cup), then take a paper towel and gently 
wipe around the 'mouth' of the ornament, you'll have less glue drip
back in, causing streaks. Didn't get a picture of that, sorry.
 Turn back over and put in a clean cup.  Using a different funnel,
pour in your red glitter.  I used about 2 Tablespoons if I had to guess.
As we did with the glue mixture, gently swirl the ornament 
around, coating slowly and carefully.  I tried one with just
putting my thumb over the hole and shaking, but it didn't 
work very well. There were some bald spots.
Pour back into your glitter container.  As we did with the glue,
turn the ornament as you are putting it back in the container.
This will coat the neck of the ornament better.
Here's how it looks....purty, huh?!
Put your cap back on.  Hard to do and take a picture of!
Continue on with the rest of your ornaments, letting
them rest in the original container so they don't roll away!
Take some ribbon and measure around your ornament.  Give yourself
about an extra inch.  Mine ended up being about 11" or so.  Cut.
Using your handy dandy Stampin Up 1" square punch,
cut yourself out a square from the Glimmer Paper.
Or, you could just cut yourself a square freehand. 
Yeah, I don't do anything freehand that I can use a punch for!
Turn your square over on a cutting mat and lay 
your ribbon down in the center.  Draw a line on either
side.  Turn a 1/4 turn and do it again.  This will help
you know where to cut your lines.  Okay, mine are crooked!
You will end up with something like this, probably straighter though.
You are going to cut two slits across from eachother,  starting 
where the point of my Xacto knife is, going down, but stop at 
the next perpendicular line.
 "Thread" your ribbon through the front.  Boy, that shimmer
paper is blinding when a flash hits it!  Phew!
Turn your ribbon over and run your glue runner over the whole
thing, paper included.  You only have to do one strip.  The original
tutorial called for Sticky Strip, but that stuff is expensive.  This worked fine.
On the 'equator' of your ornament, glue down your Santa Belt.
It may take you a couple of tries to get it straight all the way around.
Punch out a few black circles and glue them down, too.  
I used Tombo Mono Multi Adhesive for that.  Glue dots would work, too.
If you're still feeling crafty and perhaps a bit ambitious,
you can try a Rudolph ornament, too!
Keeping with the thrifty theme, I wanted to make an inexpensive,
yet pretty way to deliver my gifts.  I had a coupon and got these
cute bags for about $1, but looking back, I could have used
brown paper lunch sacks.  These did take the ink better though.
I stamped them with supplies I had on hand.
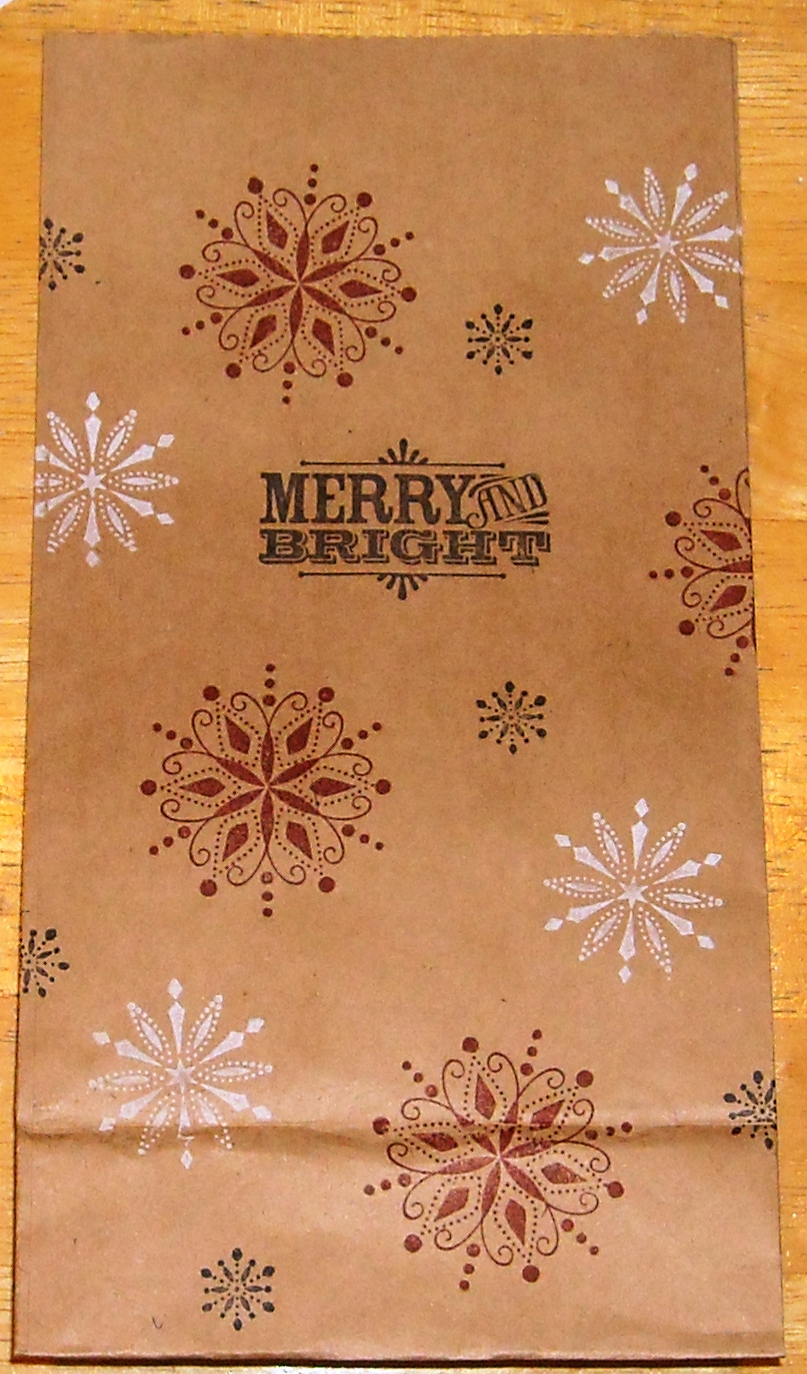
I then made a little card insert for each
using the Santa theme.  A nice hand-written
note to show my appreciation.
I found some shredded metallic paper at Dollar Tree for, well, a dollar!
This stuff went a lot further than I thought it would, actually.
I put plenty in the bottom of each bag to make a nice little nest for
my ornament, then slipped my card inside.  Forgot to mention that
I found some stretchy metallic cord to tie to each ornament
so the recipient can hang it up right away.
I then punched two holes at the top of the folded bag about 3/4" apart.
Then I slipped some sheer ribbon through the front two holes and criss crossed 
them in the back.  Then I came back thru the front to make a bow.  Cute, huh?
So far, the responses to these ornaments have been really good.  While I didn't spend a lot, I made something from the heart.  It's nice to give a homemade gift sometimes, I think.  It shows you care to take the time to make something really personal for those special people in your life.  Thanks for taking the time to read my tutorial.  I hope you have the most Blessed Christmas ever!
{Printer Friendly Version}

Sunday, December 11, 2011

How to cut a head of lettuce so you don't get huge chunks that you can't fit in your mouth

Okay, so aside from having the world's longest blog post title, this might sound totally patronizing, too.  It's your lucky day!  I'm going to show you how to cut a head of lettuce.   For those of you who buy the bagged lettuce (can you say RIPPP  OFFFF?!), listen up!  You need this! You will save a lot of cash this way.

Start with a head of lettuce from Aldi's (anywhere from .25c to 99c on any given day), a cutting board and a knife.   I'm using a lettuce knife.   I've heard you should never cut lettuce with a metal knife because it turns the lettuce brown at the edges. Guess what?  It does the same thing with the plastic knife.  Sure wish I had that $4.99 back.  A head of lettuce should be hand-torn in order to avoid 'rust'.  I was a "Salad Wench" at Grandmothers restaurant as a teenager.  I know these things.

Find the rattiest looking head of lettuce that you can.  
This is apparently what I did because this thing is sad looking!
Anyway, you see that rusty core at the bottom?  
We are going to remove that the easy way.
Hold the head of lettuce in your hand like a basketball 
and SMACK that core straight downward on the edge of the sink HARD.  
This is the way they did it in the restaurant!  Really!
Pull the core out from the center and discard.  
See how little waste there was?
Pull off the icky outer leaves.  I always pick off the 
rusty, thick bottom pieces from the remaining good leaves, too.
Cut head into quarters.   How is it that I managed
to pick the one head of lettuce that is retarded 
and won't sit up straight for a picture?  LOL!
I turn one section over at a time and cut that wedge in half length-wise.
Then I turn it sideways and cut both wedges into one inch sections.
I do this because I HATE HATE HATE getting huge pieces of lettuce
in my salad that I cannot possibly fit into my mouth.
Fill your salad spinner with water and toss in the leaves.
I usually clean them at least twice.  I just shove the lettuce
down and run my hands through it a few times to make sure
to get out any bugs/dirt.  Man, you shoulda seen the GROSS
things that came in those big boxes of lettuce at the restaurant!
Once it's very clean, I add fresh, clean water and a handful 
of ice.  I then put my lettuce in there for at least 10 minutes.
Makes it nice and cold and crisp.  Didn't take a pic of that, 
but here's the ice, lol!
Then, of course, I spin the lettuce.  I do it three times to get all of the water out.
After serving up what we needed for supper, 
I put the leftovers in a gallon baggie with a paper towel folded up.
This will wick away any excess water.
I then fold it over to get out as much air as I can.
And if I'm feeling particularly anal, I'll roll the baggie and squish 
all the excess air out of that small hole you see above ^, then quickly 
zip shut. Then it looks like this. It does kinda bruise the lettuce,
so I wouldn't do it if we were expecting company.  
Not that we ever do.  No one likes us.
Serve this up with some homemade Ranch Dressing

This will stay nice in the fridge for a few days, just as long as the pre-washed bagged kind.  But this will give you two to three times as much at ONE THIRD the price!  It really doesn't take that long to do.  Besides, being the weirdo that I am, I always washed the pre-washed stuff anyway, LOL!  I think it has such a weird taste to it.  I never buy it anymore.

Hey, want a hint at how to pick a nice head of lettuce without all the bitter yellow stuff on the inside?  Choose the LIGHTEST  head (weight-wise) in the bunch.  It will have the least bit of yellow lettuce in the center and you'll get just as much lettuce as a heavier head.  How do I know?  You learn a few things whacking thousands of lettuce heads against a sink! 

How to efficiently cut a bell pepper

I used to cut peppers a different way every time, looking for a better way each time.  I even tried that fancy 'chef way', where they cut out the membrane in one long strip.  Guess I don't have the right tools or talent for that because it never worked for me.  I don't know what took me so long to figure this out, but I think I'll be doing it this way from now on.
You see those little bumps on top.  Where they indent from top to bottom
is where the membranes are.  Having a stroke of temporary genius,
I thought....well, what if I just avoided those altogether rather than cut them out?
So, I placed my knife to where I would cut the 'meat', but not the membranes.
See how I'm just to the right of the indents?
Look at the nice little membrane-free piece I got off of it!  
This was exciting news!  Exactly what I was going for!  Whoo Hoo!
Continue all the way around. 
Here's what's left.  Pretty cool, huh?
I certainly wasn't going to waste the little pepper triangles at the top and 
the bottom, so I cut off the good part, not going down into the membrane.
Here's what the bottom looked like after.  The part I cut off 
kinda looks like shark teeth!  :)
And do the same to the top.
Here's what was left.  I can even cut those little top
parts off and use them, too, now that I think of it!
Cut each segment into strips.
Then, depending on what you'll be doing with your peppers,
you can cut them into small chunks or leave as is. 
I'm honestly not sure if I got as much off of this as I usually would doing it a different way, but it sure was quick and easy.  I SEEMS like I normally have more waste than this, but that may be because I usually have a bunch more little chunks of stem/seeds here and there to throw out.  You could always save the center for veggie broth, but I detest veggie broth, so this baby is going in the trash.Welllll, now that I think of it, I've never made it homemade, so I should retract that for now.  :)
