Showing posts with label Vegetables. Show all posts

Sunday, December 18, 2011

Quick Microwave Broccoli that's properly done

When I was a kid, my family used to BOIL broccoli.  Yup, boil it in a pot of water.  Of course, it came in a frozen state, so waddya want?  Knowing that virtually all of the nutritional value of that broccoli was gone, I now have an obligation to do better for my family.  And by that, I mean that I always steam my broccoli with the little steamer pan you set on top of your regular pan of water.  But since I had just a little bit left over from when I made broccoli salad, I thought....ehhhhhh, do I really want to clean two pans and a lid,  uhhhh, drag all of that stuff out?   Not really.  So, I did an experiment figuring if it didn't work, no huge loss.


I took my extra pieces of cut and cleaned broccoli and put them in a small glass container.
I then dumped in 1T water.
I then covered it in plastic wrap because I didn't have a glass lid to fit this.
 I guess you shouldn't use plastic in the microwave because you can ingest BPA's.  
  I'm really not sure if this applies to plastic wrap.  Probably.  I nuked it for 2 minutes.
And look how nice it came out.  It was just like I like it...firm, yet 
soft enough to spear.  A little bit of bite to it and a nice vibrant green!
It really did taste just like when I steam it the 'hard' way.  
I know, you might be saying...well, it WAS steamed, lady!!!
 I guess I didn't expect it to do it so nicely in a microwave, that's all.   
Now, this is no huge revelation or anything, but it did please me.
So, if you're pressed for time, this might be a little tip that can
save you a few minutes of steaming time and a few dishes to clean up!
Now, go slather that healthy steamed broccoli in some cheese sauce!

Broccoli Salad Yum Yum

I absolutely LOVE this broccoli salad.  It's sweet, it's savory, it's tangy, it's awesome!  And so simple, too.
Here's what you'll need for a full batch (only a half batch is shown)
1 Head broccoli, washed and trimmed
1 Lb Bacon, cooked and chopped
1/2-1C Sharp Cheddar, depending on your tastes and love for cheese
2T Red Onion, very thinly sliced
1 1/4C REAL Mayo
3T Red Wine Vinegar (no substitutes)
1 1/2T Sugar (or Stevia or Truvia)

Start by washing and chopping your broccoli.  
Stay really close to the florets, not getting a lot of stem.
I separate them into teeny tiny pieces because, let's face it, no one
wants a mouthful of JUST raw broccoli.
If you are taking this to a family get together and know the entire
bowl will be eaten that day, the following is a great tip to stretch it out.
You can add some of the smaller stems to your salad, but I find it helpful
if I pare the woody part off first.  This is just personal preference.
If it's going to sit at home and be eaten gradually over a few days, don't 
do the following because it will actually start to turn brown on you.
Then chop the stems into smaller pieces.  These are the little guys
that'll turn brown on you, not the whole salad.
I wash my broccoli again once I have it cut.  I'm weird like that.
Strain your broccoli, throw into a large bowl with the rest of the ingredients.
You'll note my onion is not thinly cut as it says in the ingredient list.
This is because I just  happened to have some already diced in the fridge.
Looking back, I wish I would have taken the time to cut it finely. 
That red onion was pretty invasive!
Now prepare your dressing.  Add your REAL mayo to a bowl.
and pour your vinegar over it.
At this point, you will add in your sugar. I used Truvia and it tasted great!
Stir or whisk together until it no longer feels grainy.
Pour over your salad.
Stir well and refrigerate.  I think it tastes better the next day.
I open the fridge and stir it every few hours to combine the flavors.
Since I only used half of my broccoli for the family gathering
we were having the next day, I decided to cook the other half
for dinner that night like this.   

Sunday, December 11, 2011

How to efficiently cut a bell pepper

I used to cut peppers a different way every time, looking for a better way each time.  I even tried that fancy 'chef way', where they cut out the membrane in one long strip.  Guess I don't have the right tools or talent for that because it never worked for me.  I don't know what took me so long to figure this out, but I think I'll be doing it this way from now on.
You see those little bumps on top.  Where they indent from top to bottom
is where the membranes are.  Having a stroke of temporary genius,
I thought....well, what if I just avoided those altogether rather than cut them out?
So, I placed my knife to where I would cut the 'meat', but not the membranes.
See how I'm just to the right of the indents?
Look at the nice little membrane-free piece I got off of it!  
This was exciting news!  Exactly what I was going for!  Whoo Hoo!
Continue all the way around. 
Here's what's left.  Pretty cool, huh?
I certainly wasn't going to waste the little pepper triangles at the top and 
the bottom, so I cut off the good part, not going down into the membrane.
Here's what the bottom looked like after.  The part I cut off 
kinda looks like shark teeth!  :)
And do the same to the top.
Here's what was left.  I can even cut those little top
parts off and use them, too, now that I think of it!
Cut each segment into strips.
Then, depending on what you'll be doing with your peppers,
you can cut them into small chunks or leave as is. 
I'm honestly not sure if I got as much off of this as I usually would doing it a different way, but it sure was quick and easy.  I SEEMS like I normally have more waste than this, but that may be because I usually have a bunch more little chunks of stem/seeds here and there to throw out.  You could always save the center for veggie broth, but I detest veggie broth, so this baby is going in the trash.Welllll, now that I think of it, I've never made it homemade, so I should retract that for now.  :)

Tuesday, November 29, 2011

Cucumber Tomato Salad

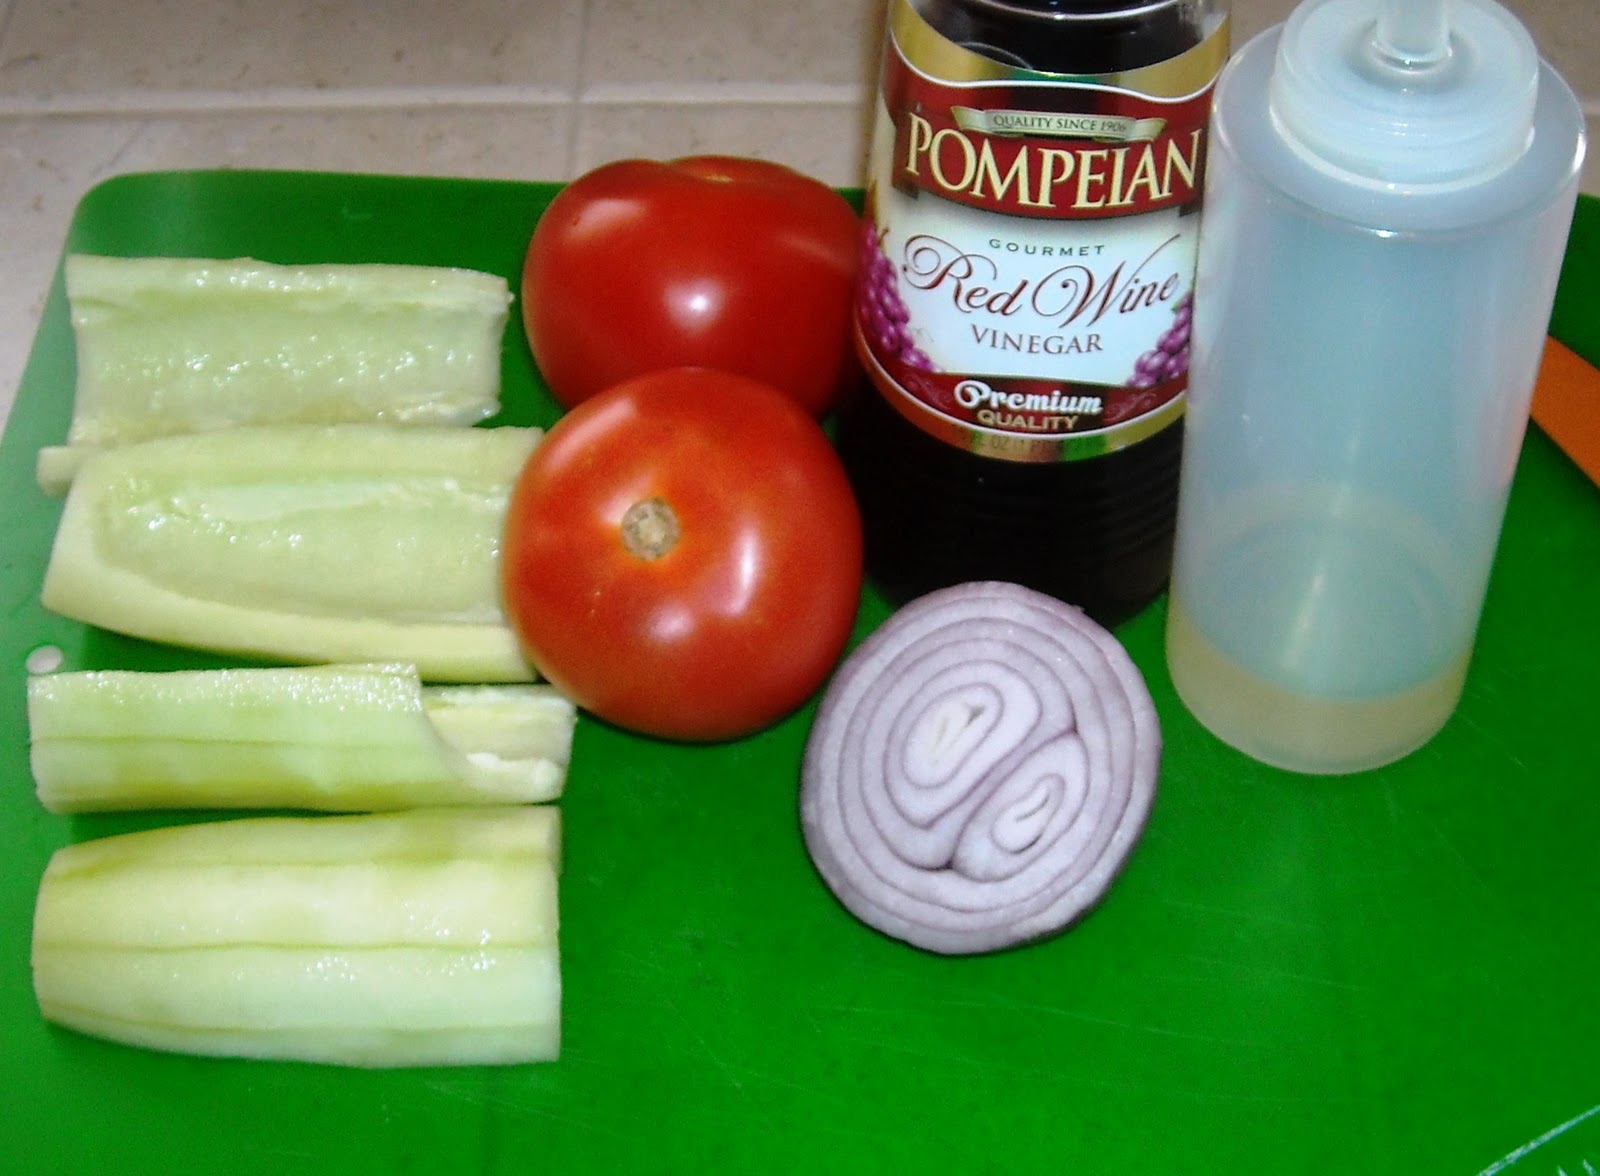
Here's a simple recipe that is best suited to summer, really.  I made this to take to my Aunt and Uncle's house for Thanksgiving dinner because I'm on a diet and I needed something I could eat.  I'm going to show you the 'normal' version.  For the love of God, people, unless you are desperate, do NOT make the diet version like I did using Truvia.  Blech!  Normal version?  Yum!!!


You will need:
1 Large Cucumber
2 Medium Tomatoes
1/4 to 1/2 Small Red Onion
3T Red Wine Vinegar
2t Extra LIGHT Olive Oil (or other neutral flavored oil)
Not shown:  Sugar to taste (or Truvia if you're on a diet from hell like me)


Start by peeling, quartering and seeding your cuke.  Just use a spoon 
to scrape out the seeds, then you'll have no burps.  Don't waste your
hard earned street-walkin', pole-dancin' dollars on the high and mighty
English seedless cucumbers.  What a rip!  I'm convinced you're paying
the extra $2.19 for it to be wrapped in cellophane! 
Go to Aldi's!  79 cents!
 Then dice it. 
Did you know that "dicing" is used in reference to actual dice?  It's true!  
The size of a diced food should be about 1/2-3/4" square, or the size of a dice.
If you want it smaller, you would do a 'small dice'.  I know, I'm a
veritable wellspring of information.  It's the burden I bear for you people.
I like to cut each quarter into strips, then dice it.  Easier.
And lastly, mince up your onion.  I only used about a Tablespoon
in the whole salad.  Red onions are just a little too pushy, 
if you ask me!  They like to take over!
Throw it all in a container and add in 2-3T Red Wine Vinegar.  And yes,
I do realize that it's a teaspoon in the picture.  All of my Tablespoons
were dirty from doing other fancy projects that day.
 Then add in about 2t oil.  I used 1T, 
but found it a little on the oily side.
Sprinkle in your sugar and mix well.  As mentioned earlier, I used Truvia.
While it initially tasted pretty good, it quickly turned bitter as time wore on.
And by 'wearing on', I mean a few hours.
And lastly, add some salt and pepper to taste and mix well.

Cover it and throw it in the fridge for a few hours, mixing now and again to distribute the oil and vinegar.  It tends to taste better if you leave it overnight.  It's really low cal and filling if you eat a cup or two of it.  Har de har.  No really, I've done it. In the summer, I tend to add a minced garlic clove which really ups the flavor.  The only problem is, I like it so much that way, I eat a lot and then I just smell like a salami.  All day. 

Saturday, July 2, 2011

Lemon Garlic Broccoli

Here's a veggie dish I made last night.  It called for broccolini, which I didn't have.  I did have broccoli though!  I apologize that I didn't finish the pictorial.  A neighbor stopped by and I invited him to dinner.
Because I was so busy talking to him while my hubby cooked the chicken, I totally forgot to take the rest of the pix!  I finally remembered when I served up the dish!  I'll explain what I did though.

Here's what you'll need
Ingredients:
1/2Lb Broccoli (I didn't use all shown...wouldn't fit in my steamer!)
1T Olive Oil
1T Fresh Lemon Juice
1t Lemon Zest
1 Clove Garlic, minced
Salt and Pepper to taste

Combine your olive oil, lemon juice, zest, minced garlic, salt and pepper
in a bowl.  Give them a stir.  Let them sit for a bit to let the flavors meld.
Pour a couple of inches of water into a pot.
Place a steamer insert on top.  Your water should not touch the bottom
Trim your broccoli.  See that skin on the outside?  I like to carefully peel a 
very thin layer of that off with a knife.  It can be tough and woody sometimes.
Okay, so here's when the neighbor came over and I failed to finish my pix. 
But here's what you do next...
After you trim your broccoli, place broccoli florets in your steamer insert.  I pack them in tightly, tucking stems under other pieces.  Turn heat to high and put lid on.

When it starts to boil, set your timer for 5 minutes.  Lift lid and check tenderness. Right now, it should be a bright healthy green.  We like ours on the firmer side, but we still needed to add a couple of minutes to that.

Remove steamer insert and plop your broccoli into your bowl of marinating ingredients.  Toss to coat.  Serve.
Let the (now-green) water in the bottom cool and use to water your garden.
Notes:
I screwed up big time.  I thought since I had such a huge bundle of broccoli, I had better double the marinade/sauce ingredients.  Big mistake.  Because I couldn't fit the whole thing of broccoli into my steamer,  I ended up with the right amount of broccoli, but double the sauce.  Instead of saving half the sauce for another day, I used it all. Whoa.  Talk about over-powering!  My husband and neighbor said it tasted great.  Me, I thought it was reminiscent of Lemon-Scented Pine-Sol, LOL!  Totally my fault. Otherwise, I think this would have been quite pleasant.  There was nothing wrong with the recipe.  It was me.  Live and learn, woman!

I think I may substitute butter for the olive oil next time.  I just like butter.

This vegetable dish costs $1.69 total, or 42 cents per serving for four people.

Carrot Ginger Rice

Last night for dinner, I wanted to make some things we've never had before.  I stumbled across a really good cooking site called For the Love of Cooking and found this recipe.  This was definitely something we had never had before, so I tried it.

Here's what you'll need:
Ingredients:
1C Basmati Rice (I only had medium grain)
2C Chicken Broth
1T Olive Oil
1/2 Sweet Onion (I used Vidalia)
2 Carrots, peeled and grated
1t Fresh Ginger, peeled and grated/minced
1 Clove Garlic, grated
Salt and Pepper to taste
Dash Cayenne Pepper (optional.  I omitted)
1/4C Fresh Cilantro (I didn't have any)

Pour your rice into a pot.
 
Add your chicken stock.  I used low-sodium because I was out of
homemade.  That would have made this even better!
Give it a stir, put the lid on and bring to a boil.  Then turn down 
to a simmer and cook for 20 minutes, lid on the whole time.
While that's cooking, pour a Tablespoon of olive oil into a frying pan.
The original recipe calls for 2t as shown below, but I ended up adding 1t more.
Dump in your diced onion and stir over medium heat.
While that's (lightly) browning, start on your grating.
I didn't have any whole carrots, so I used 10 baby carrots.  I also
used a fine grater, so my end product looks a lot different than the original..
Save the little nubbins you can't grate without taking off a finger
and put them in your stock bag in the freezer.
Grate your garlic.
And then your peeled ginger.
Not sure if you can see it in this pic, but my ginger had a blue-green
tinge to it.  This freaked me out until I read that it's actually a higher
quality, more desirable thing to have in ginger.  It's Hawaiian Blue Ginger.
Who knew?!  Not me!  I thought it was going bad or something!
When your onions are slightly brown, 
Plop in your other ingredients.
Give them a stir and cook for a couple of minutes
to take away the raw taste of the grated ingredients.
Add in your rice.
Give it a stir to combine.
Add in salt and pepper to taste.  If you are adding cilantro,
now would be the time to add it.
Serve!
Notes:
I wish I had cilantro because I love it!  But then the rest of my family wouldn't eat it  
I did feel like it needed some acid or something.  (Probably because there was no cilantro, darn it!)  I ended up squeezing the juice of an orange in this afterward.  That helped quite a bit.

This was a really unusual tasting dish that we loved.  I would definitely make this again.
I omitted the cayenne pepper because the garlic and ginger already gave it a mild heat.  I didn't want it to be too hot for my son.  Or my husband, who's a total weenie in the spice department.

This side dish came to $2.43 and made about 6 servings at 40 cents each.  The reason it's so high is because I used canned chicken stock.  Had I used my own (I was out), it would have only come to about 93 cents, or 15.5 cents a serving.  Big difference!   That's one good reason to go out and get a chicken!

I served this up with some Garlic Ginger Chicken  and some Lemon Garlic Broccoli.  All recipes courtesy of For the Love of Food with some minor changes.

{Printer Friendly Version}