Showing posts with label Salads. Show all posts

Sunday, December 18, 2011

Broccoli Salad Yum Yum

I absolutely LOVE this broccoli salad.  It's sweet, it's savory, it's tangy, it's awesome!  And so simple, too.
Here's what you'll need for a full batch (only a half batch is shown)
1 Head broccoli, washed and trimmed
1 Lb Bacon, cooked and chopped
1/2-1C Sharp Cheddar, depending on your tastes and love for cheese
2T Red Onion, very thinly sliced
1 1/4C REAL Mayo
3T Red Wine Vinegar (no substitutes)
1 1/2T Sugar (or Stevia or Truvia)

Start by washing and chopping your broccoli.  
Stay really close to the florets, not getting a lot of stem.
I separate them into teeny tiny pieces because, let's face it, no one
wants a mouthful of JUST raw broccoli.
If you are taking this to a family get together and know the entire
bowl will be eaten that day, the following is a great tip to stretch it out.
You can add some of the smaller stems to your salad, but I find it helpful
if I pare the woody part off first.  This is just personal preference.
If it's going to sit at home and be eaten gradually over a few days, don't 
do the following because it will actually start to turn brown on you.
Then chop the stems into smaller pieces.  These are the little guys
that'll turn brown on you, not the whole salad.
I wash my broccoli again once I have it cut.  I'm weird like that.
Strain your broccoli, throw into a large bowl with the rest of the ingredients.
You'll note my onion is not thinly cut as it says in the ingredient list.
This is because I just  happened to have some already diced in the fridge.
Looking back, I wish I would have taken the time to cut it finely. 
That red onion was pretty invasive!
Now prepare your dressing.  Add your REAL mayo to a bowl.
and pour your vinegar over it.
At this point, you will add in your sugar. I used Truvia and it tasted great!
Stir or whisk together until it no longer feels grainy.
Pour over your salad.
Stir well and refrigerate.  I think it tastes better the next day.
I open the fridge and stir it every few hours to combine the flavors.
Since I only used half of my broccoli for the family gathering
we were having the next day, I decided to cook the other half
for dinner that night like this.   

Sunday, December 11, 2011

How to cut a head of lettuce so you don't get huge chunks that you can't fit in your mouth

Okay, so aside from having the world's longest blog post title, this might sound totally patronizing, too.  It's your lucky day!  I'm going to show you how to cut a head of lettuce.   For those of you who buy the bagged lettuce (can you say RIPPP  OFFFF?!), listen up!  You need this! You will save a lot of cash this way.

Start with a head of lettuce from Aldi's (anywhere from .25c to 99c on any given day), a cutting board and a knife.   I'm using a lettuce knife.   I've heard you should never cut lettuce with a metal knife because it turns the lettuce brown at the edges. Guess what?  It does the same thing with the plastic knife.  Sure wish I had that $4.99 back.  A head of lettuce should be hand-torn in order to avoid 'rust'.  I was a "Salad Wench" at Grandmothers restaurant as a teenager.  I know these things.

Find the rattiest looking head of lettuce that you can.  
This is apparently what I did because this thing is sad looking!
Anyway, you see that rusty core at the bottom?  
We are going to remove that the easy way.
Hold the head of lettuce in your hand like a basketball 
and SMACK that core straight downward on the edge of the sink HARD.  
This is the way they did it in the restaurant!  Really!
Pull the core out from the center and discard.  
See how little waste there was?
Pull off the icky outer leaves.  I always pick off the 
rusty, thick bottom pieces from the remaining good leaves, too.
Cut head into quarters.   How is it that I managed
to pick the one head of lettuce that is retarded 
and won't sit up straight for a picture?  LOL!
I turn one section over at a time and cut that wedge in half length-wise.
Then I turn it sideways and cut both wedges into one inch sections.
I do this because I HATE HATE HATE getting huge pieces of lettuce
in my salad that I cannot possibly fit into my mouth.
Fill your salad spinner with water and toss in the leaves.
I usually clean them at least twice.  I just shove the lettuce
down and run my hands through it a few times to make sure
to get out any bugs/dirt.  Man, you shoulda seen the GROSS
things that came in those big boxes of lettuce at the restaurant!
Once it's very clean, I add fresh, clean water and a handful 
of ice.  I then put my lettuce in there for at least 10 minutes.
Makes it nice and cold and crisp.  Didn't take a pic of that, 
but here's the ice, lol!
Then, of course, I spin the lettuce.  I do it three times to get all of the water out.
After serving up what we needed for supper, 
I put the leftovers in a gallon baggie with a paper towel folded up.
This will wick away any excess water.
I then fold it over to get out as much air as I can.
And if I'm feeling particularly anal, I'll roll the baggie and squish 
all the excess air out of that small hole you see above ^, then quickly 
zip shut. Then it looks like this. It does kinda bruise the lettuce,
so I wouldn't do it if we were expecting company.  
Not that we ever do.  No one likes us.
Serve this up with some homemade Ranch Dressing

This will stay nice in the fridge for a few days, just as long as the pre-washed bagged kind.  But this will give you two to three times as much at ONE THIRD the price!  It really doesn't take that long to do.  Besides, being the weirdo that I am, I always washed the pre-washed stuff anyway, LOL!  I think it has such a weird taste to it.  I never buy it anymore.

Hey, want a hint at how to pick a nice head of lettuce without all the bitter yellow stuff on the inside?  Choose the LIGHTEST  head (weight-wise) in the bunch.  It will have the least bit of yellow lettuce in the center and you'll get just as much lettuce as a heavier head.  How do I know?  You learn a few things whacking thousands of lettuce heads against a sink! 

Tuesday, November 29, 2011

Cucumber Tomato Salad

Here's a simple recipe that is best suited to summer, really.  I made this to take to my Aunt and Uncle's house for Thanksgiving dinner because I'm on a diet and I needed something I could eat.  I'm going to show you the 'normal' version.  For the love of God, people, unless you are desperate, do NOT make the diet version like I did using Truvia.  Blech!  Normal version?  Yum!!!


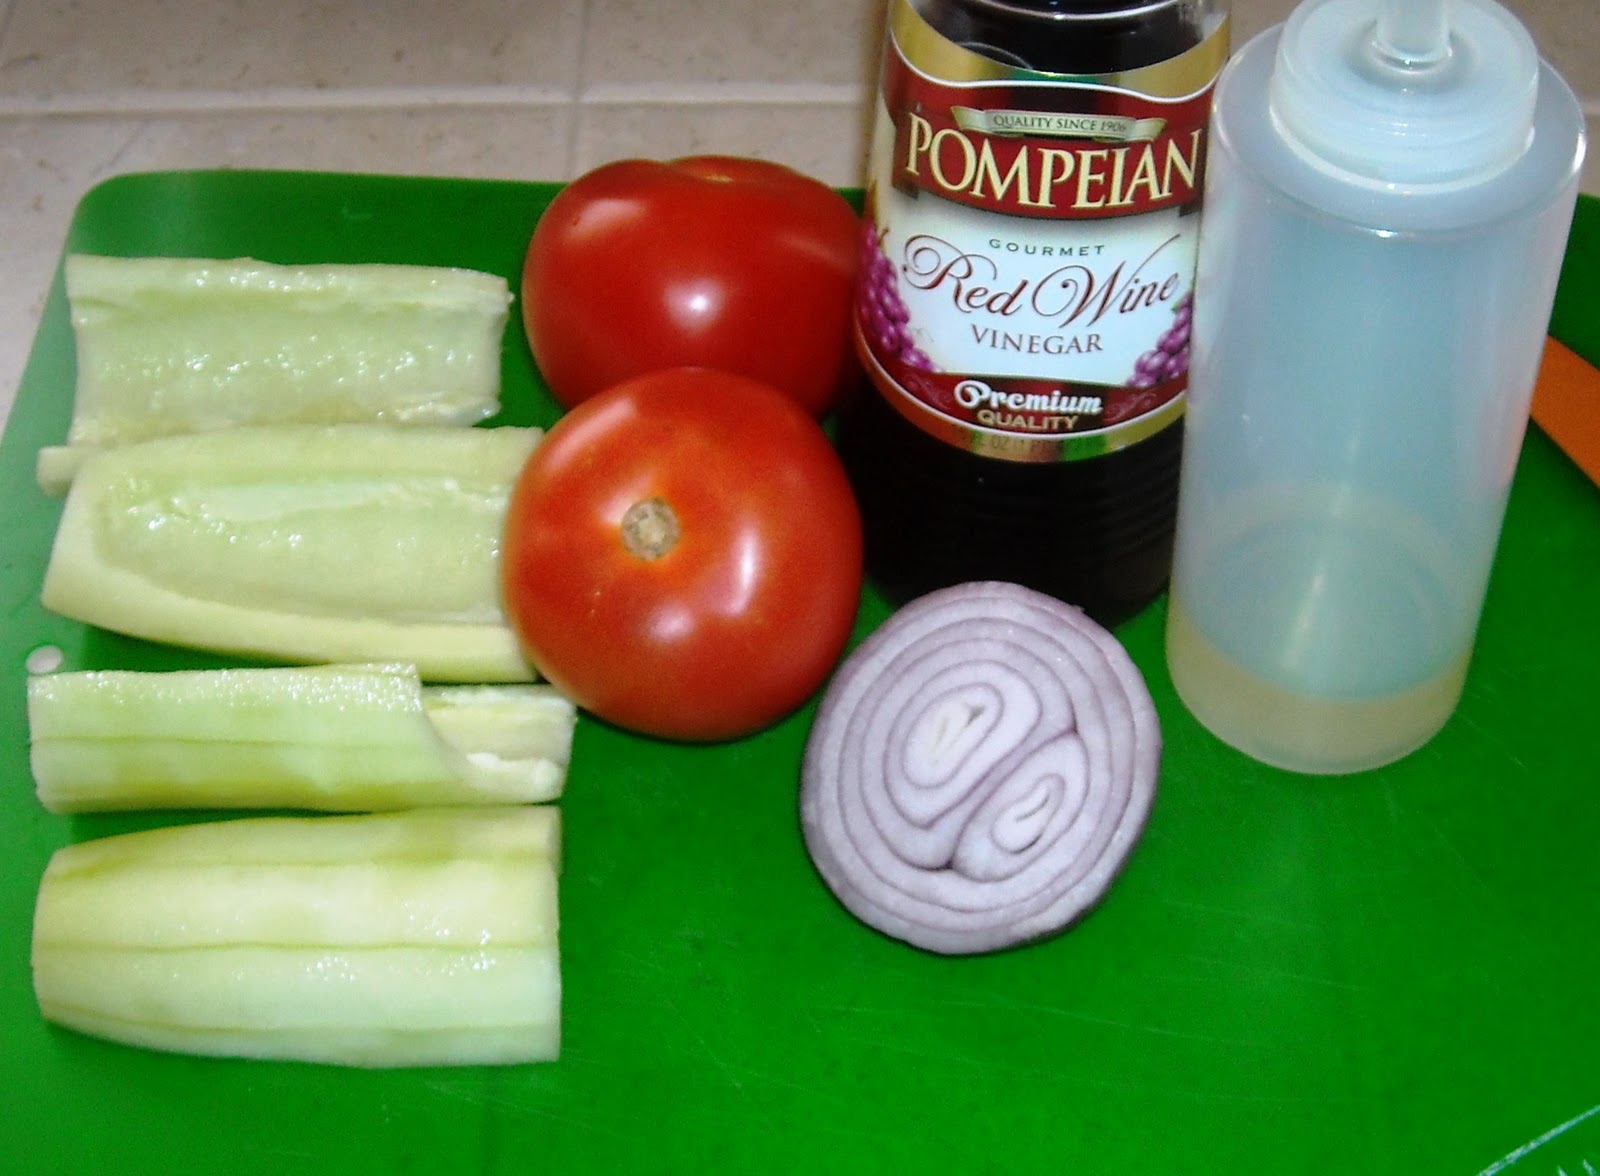
You will need:
1 Large Cucumber
2 Medium Tomatoes
1/4 to 1/2 Small Red Onion
3T Red Wine Vinegar
2t Extra LIGHT Olive Oil (or other neutral flavored oil)
Not shown:  Sugar to taste (or Truvia if you're on a diet from hell like me)


Start by peeling, quartering and seeding your cuke.  Just use a spoon 
to scrape out the seeds, then you'll have no burps.  Don't waste your
hard earned street-walkin', pole-dancin' dollars on the high and mighty
English seedless cucumbers.  What a rip!  I'm convinced you're paying
the extra $2.19 for it to be wrapped in cellophane! 
Go to Aldi's!  79 cents!
 Then dice it. 
Did you know that "dicing" is used in reference to actual dice?  It's true!  
The size of a diced food should be about 1/2-3/4" square, or the size of a dice.
If you want it smaller, you would do a 'small dice'.  I know, I'm a
veritable wellspring of information.  It's the burden I bear for you people.
I like to cut each quarter into strips, then dice it.  Easier.
And lastly, mince up your onion.  I only used about a Tablespoon
in the whole salad.  Red onions are just a little too pushy, 
if you ask me!  They like to take over!
Throw it all in a container and add in 2-3T Red Wine Vinegar.  And yes,
I do realize that it's a teaspoon in the picture.  All of my Tablespoons
were dirty from doing other fancy projects that day.
 Then add in about 2t oil.  I used 1T, 
but found it a little on the oily side.
Sprinkle in your sugar and mix well.  As mentioned earlier, I used Truvia.
While it initially tasted pretty good, it quickly turned bitter as time wore on.
And by 'wearing on', I mean a few hours.
And lastly, add some salt and pepper to taste and mix well.

Cover it and throw it in the fridge for a few hours, mixing now and again to distribute the oil and vinegar.  It tends to taste better if you leave it overnight.  It's really low cal and filling if you eat a cup or two of it.  Har de har.  No really, I've done it. In the summer, I tend to add a minced garlic clove which really ups the flavor.  The only problem is, I like it so much that way, I eat a lot and then I just smell like a salami.  All day. 

Sunday, June 19, 2011

Homemade Potato Salad

When I was a child, my step mom made the best potato salad I had ever tasted.  For years, I pined over that recipe, wishing I could taste it again. One day, I decide to make my own, going from memory how she prepared hers (minus the pressure cooker).  Lo and behold, it tasted just like it.  I should tell you...I do not like a potato salad with relish, pickles, red peppers, a lot of mustard or (any) celery seed in it.  If you're looking for something like that, you've come to the wrong place.  If you're looking for a hearty, creamy, eggy potato salad, please read on... Here's what you'll need:
 Ingredients:
10 medium potatoes (I used potatoes that were 3 to a pound)
6 Hard Boiled Eggs (see recipe for perfect hard boiled eggs HERE)
1 Small Vidalia Onion
1+ Ribs of Celery
2C+ REAL Mayonnaise
2t Mustard
Salt and Pepper to taste

Start by adding salt to a pot of water.  
Add potatoes and put on to boil.
Put your eggs on to boil at the same time, but watch them carefully!
See recipe HERE as to how to make hard boiled eggs.
While eggs and potatoes are boiling, cut your onion and celery.
Do a small dice on the onion.  I think it's nice to have small pieces
so you don't bite into a big chunk o' onion.  Blech.
For the celery, I like to cut mine down the center like this first.
This makes for easier chopping.  I don't care for really big
pieces of celery in my potato salad anyway.  Sure am picky, aren't I?
Place your celery and onions in small bowls and set aside until needed.
Please don't throw away the onion and celery ends.  Make good
use of them HERE.
When potatoes are fork-tender (about 20 minutes later), remove 
from heat.  Note:  Fork tender means just that.  Use a fork to pierce
them.  It should slide in and out easily.  Don't use a knife.  A knife
can slide in and out of most things easily and will not give you
an accurate depiction of a potato that is done in the center.
Run your potatoes under cold water to cool them.
When cool enough to handle, take one potato at a time and 
score a line all the way around the center with a knife.
Using a towel (or paper towel as I did because I didn't want to 
have to wash a starchy kitchen towel), gently push the skin
to the side and it will slide off.  Little tip I learned from my friend
Mary.  Please visit her site at "I can't believe I made that".
Chop potatoes in half the long way, then cut into 1/2-3/4" chunks
the short way.  I like to make them a little bigger because once
you start adding things in and stirring a lot, it tends to break down.
Put your potatoes in a large bowl and add 1 1/2C REAL mayo to start.
I ended up with 2C mayo at the end, but depending on the size of your
potatoes, you may need more or less.
Using an egg slicer, cut your peeled eggs the long way.
Turn a 1/4 turn and slice again the short way.
Aren't those purdy eggs?  No green yolk, not over-dry.
See my no fail recipe HERE.
Mix those in well, trying to get the yolks creamed in with the mayo.
Next, add in your celery and onion.  I ended up with about 1/2C
of celery and used it all.  I started with 1/2C onions, but decided it needed
more.  I ended up using about 3/4C of the onion and saved the rest.
You can also add your mustard now.  What you see is about 1t.
I added probably one more teaspoon more after tasting.
Next, add salt and pepper to taste.  You will also add more mayo
at this point if it's too dry.
Mix together well and put in a nicer serving dish.  
Add some paprika to the top to make it purdy.
If desired, you could save a couple of egg slices and 
put them on top for garnish.  I didn't worry about that.
This is best when refrigerated for at least 24 hours.  This time,
we just ate it right away.  It was still good.  After serving, cover
your potato salad with plastic wrap, being sure to press it down
over the top.  This helps to not have a bunch of moisture build
up on the top of it, making it runny and gross.  Put the lid on 
and keep refrigerated up to a few days at the most.
Notes:
I LOVE this salad.  I always say that I like to have a few potatoes in my 'egg' salad!   It's so creamy, eggy and delicious.  Just the way I remember Leslie making hers.

This whole salad, about 4 pounds worth, came to $2.86 with all products purchased at Aldi's.  That's about half the price of (inferior) prepared potato salad would cost you.

Because we like a really eggy potato salad, here's my general rule.  No matter how many potatoes I have, I use one egg per every two potatoes, but then add one extra at the end.  So, in this recipe, I had 10 potatoes.  That means 5 eggs, but I add one more in for good measure.

I've never really measured anything before today.  I've just gone on taste.  I'm hoping my recipe will be accurate enough for you to duplicate.

My family really enjoyed this and I hope you do, too.  Give it a try and let me know what you think!

{Printer Friendly Version}